Makepost_004 - Sewing myself a sleeping bag liner so I don't have to hate camping anymore
For someone whose brain is like 30% devoted to thinking about going outside and planning outdoor trips and dreaming about longer and longer backpacking routes, I've been known to say I hate camping.
Getting to spend longer than one day outside? Great! Having the ability to venture further into nature than you can on a day hike? Awesome. Cooking up a big pot of mac n cheese after a long day of carrying a pack? Making my morning coffee with a beautiful view? Splendid.
It was that stretch of time between cleaning up after dinner and basically having to wait out the cold until the sun comes up again that was always miserable. Even now that I've learned to tune out howling wind and various animals scampering around, I am still always somehow simultaneously cold and sweaty, with my entry-level-nice mummy bag clinging to my skin unpleasantly.
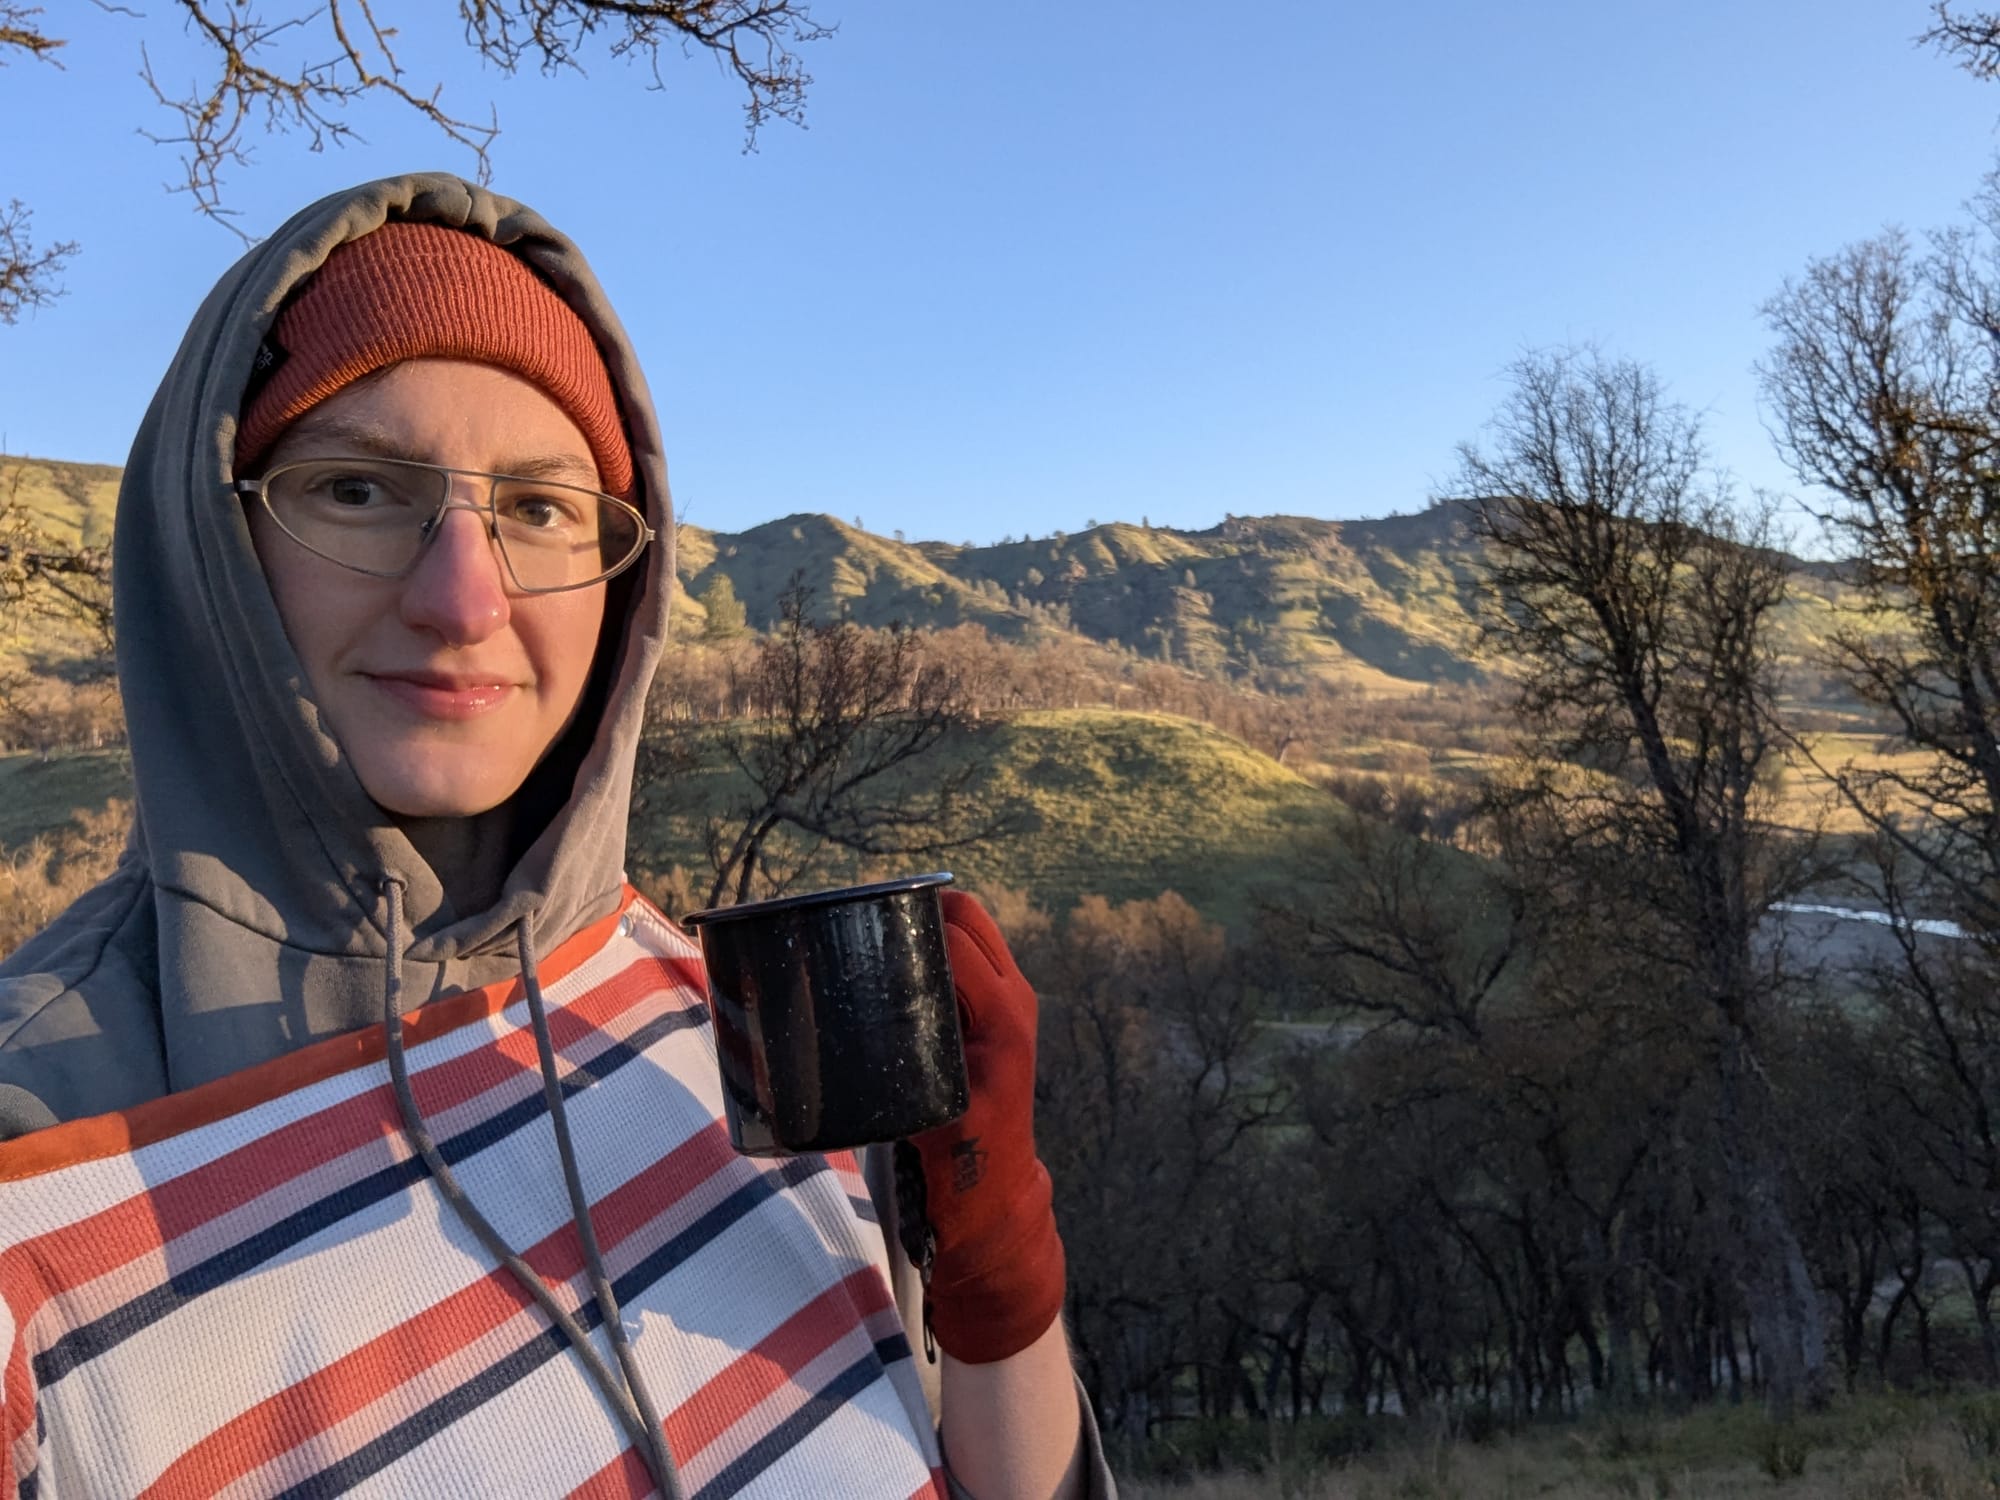
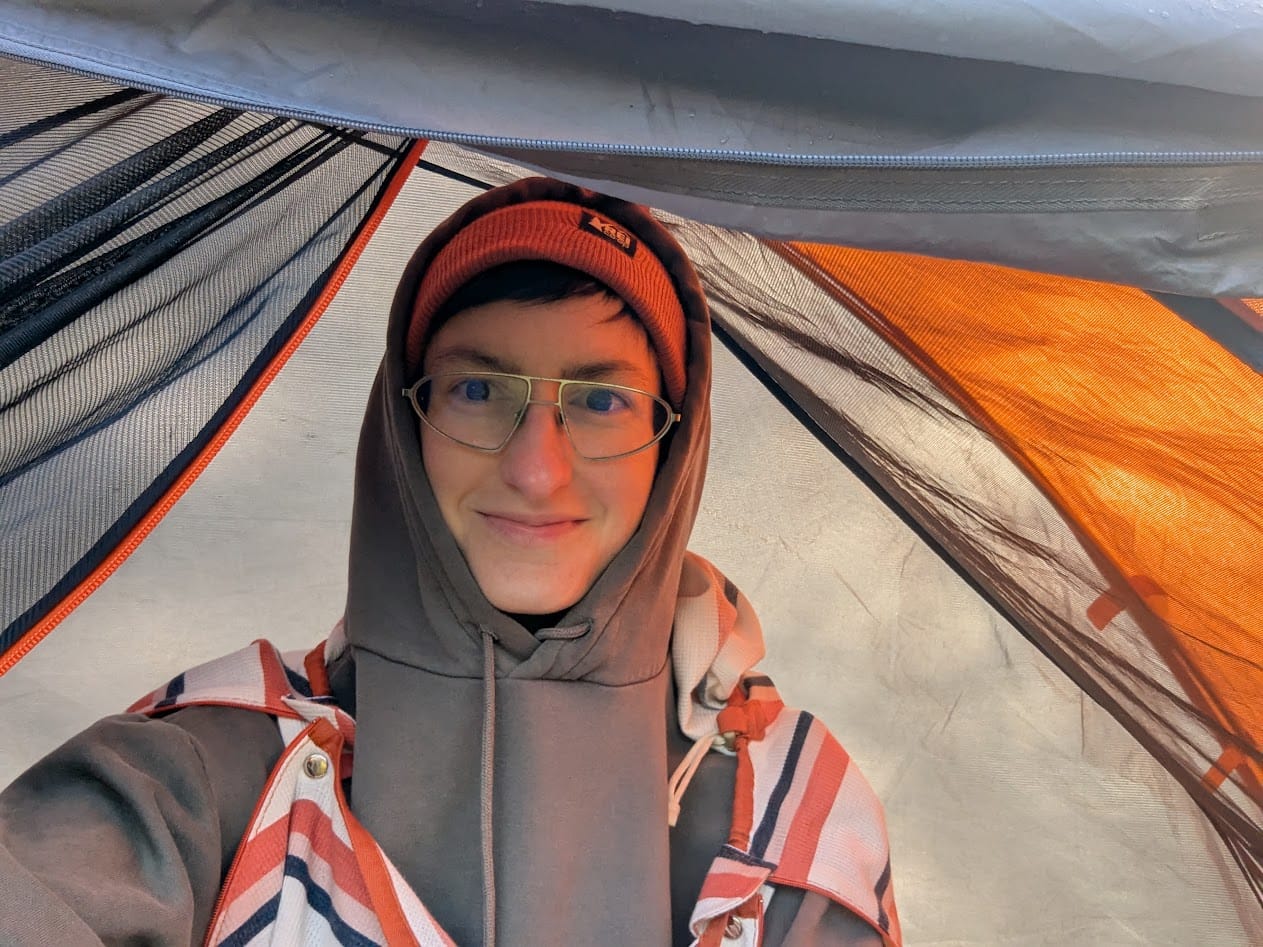
This March I did a 5-day backpacking trip to Henry Coe State Park. I knew I'd have some cold nights, so I decided to try making a lightweight sleeping bag liner, hoping it would shield me from the gross shiny sleeping bag material (autism moment) and provide some extra warmth.
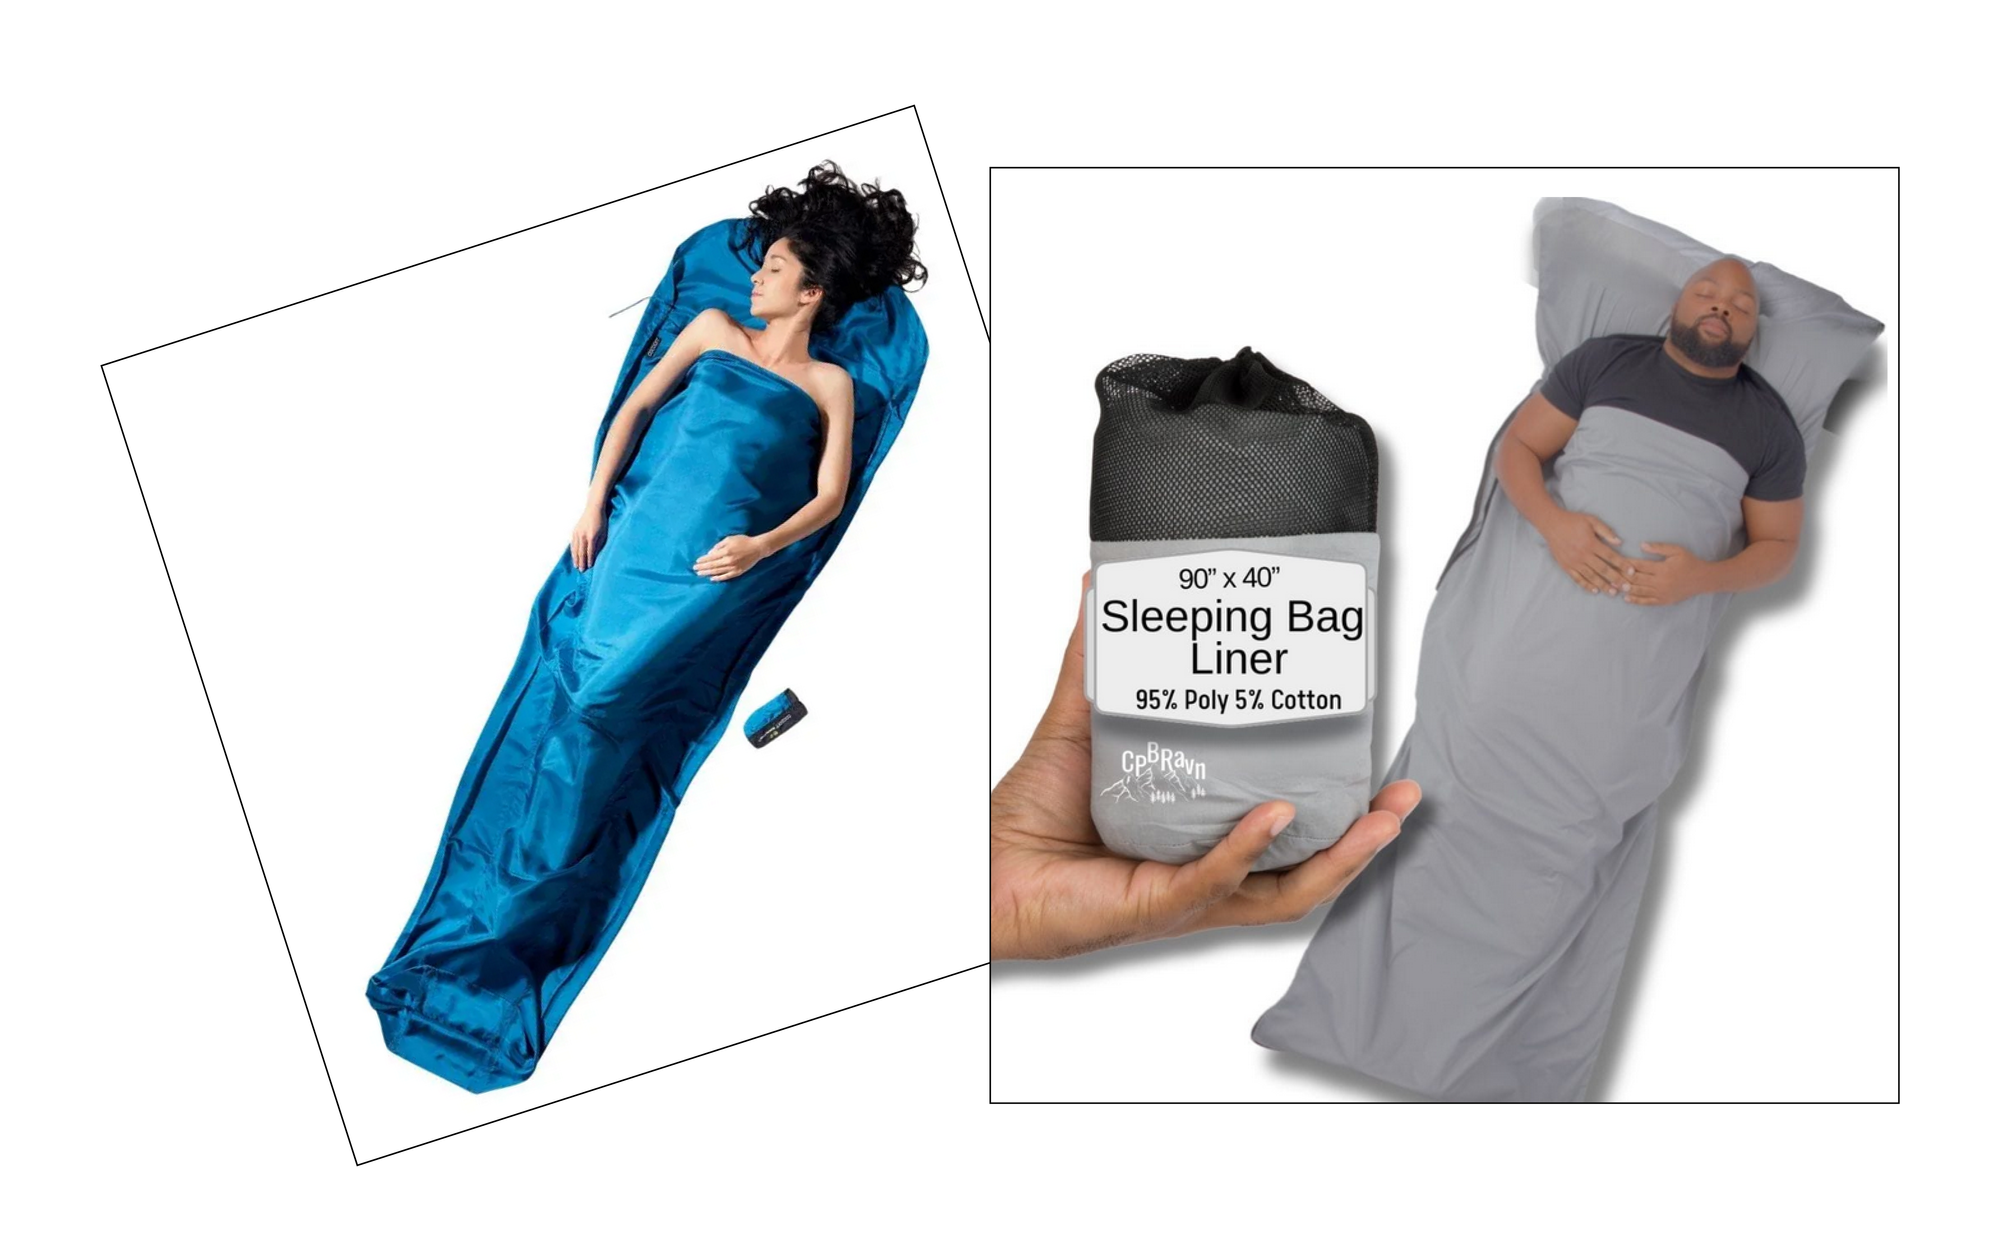
Bag liners are basically sheets for your sleeping bag, sewn into the same shape, but made of lightweight cotton, silk, or synthetic technical fabrics.
In my research I have only ever seen people talk about sleeping bag liners in a surviving-on-a-snowy-mountain type context, not people who struggle to sleep in above-freezing temps in their local state park. BUT, anything that makes trips doable for me and encourages me to keep getting out there is worth it.
I did some research and found that they can easily go for $80-90 or more. Not the worst, but if you solve all of your problems first and foremost with a trip to REI, you can end up spending hundreds or even thousands of dollars. Because I do not have thousands of dollars and also because I believe Outside is for everyone, I try to make/modify/improvise a lot of my gear, and only buy new things when necessary.
ANYWAY
My original plan was to go with a simple design, basically just tracing my sleeping bag, cutting out 2 of these shapes, and sewing them together.
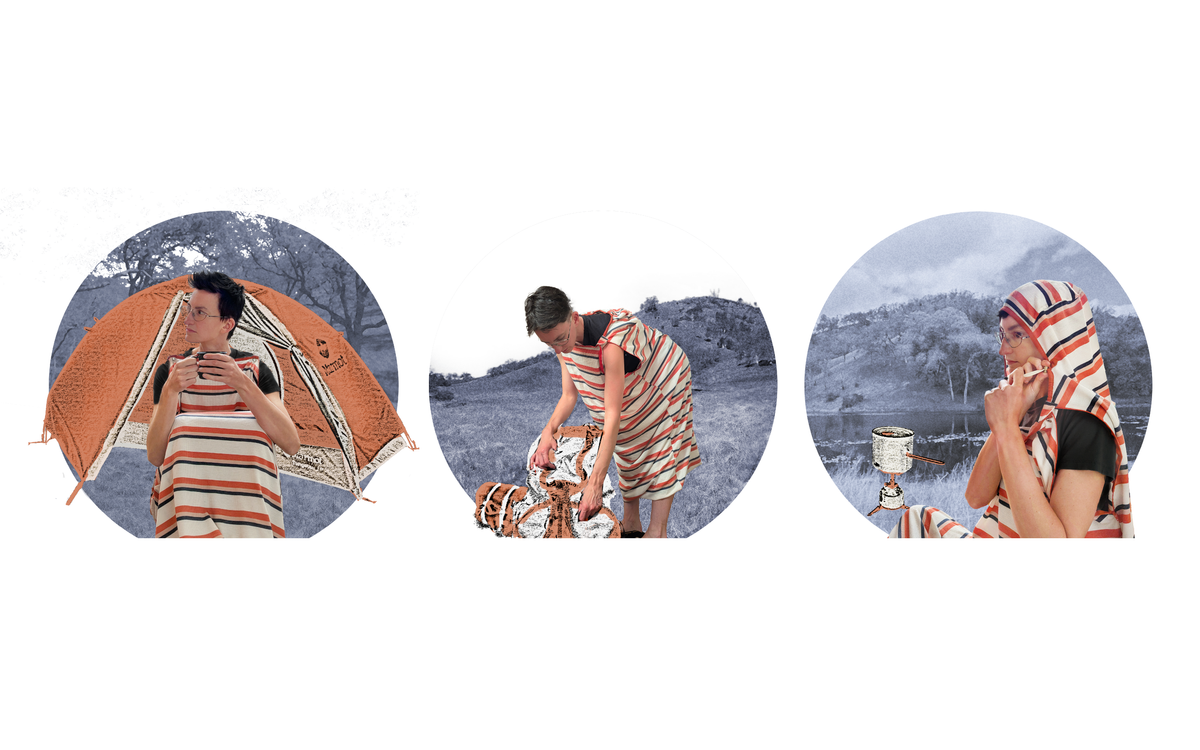
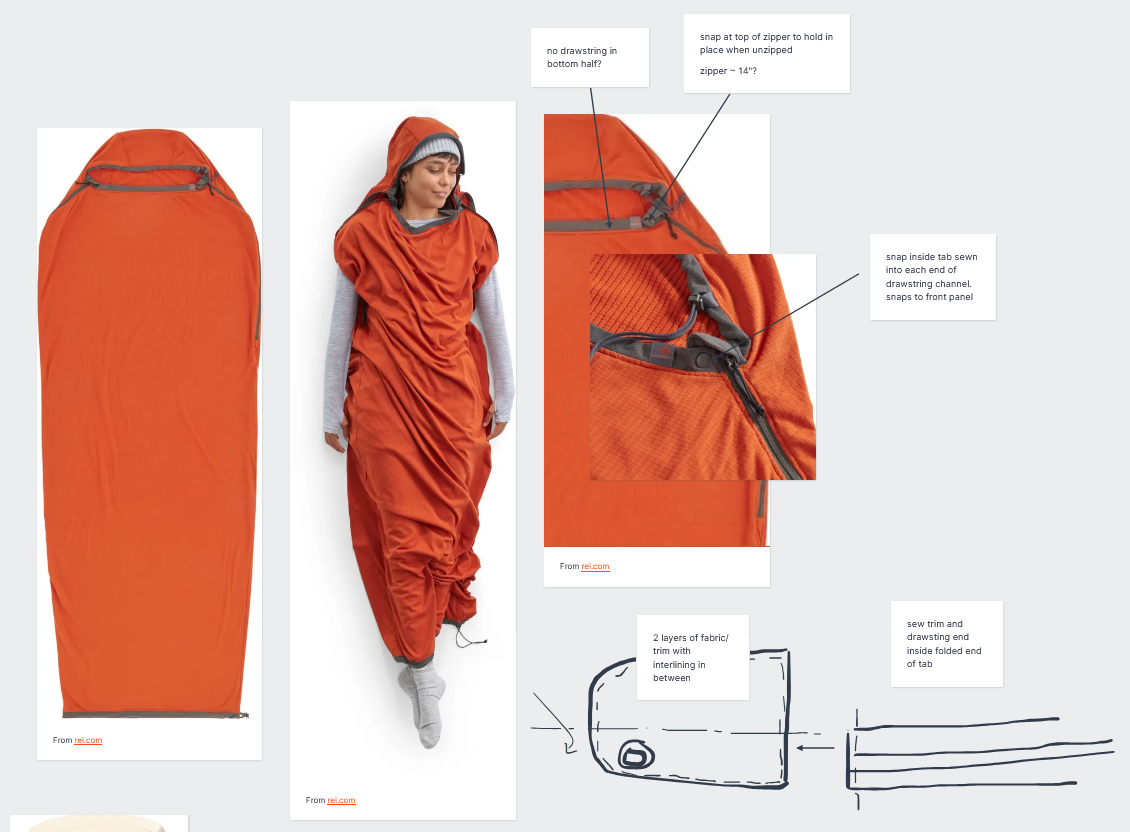
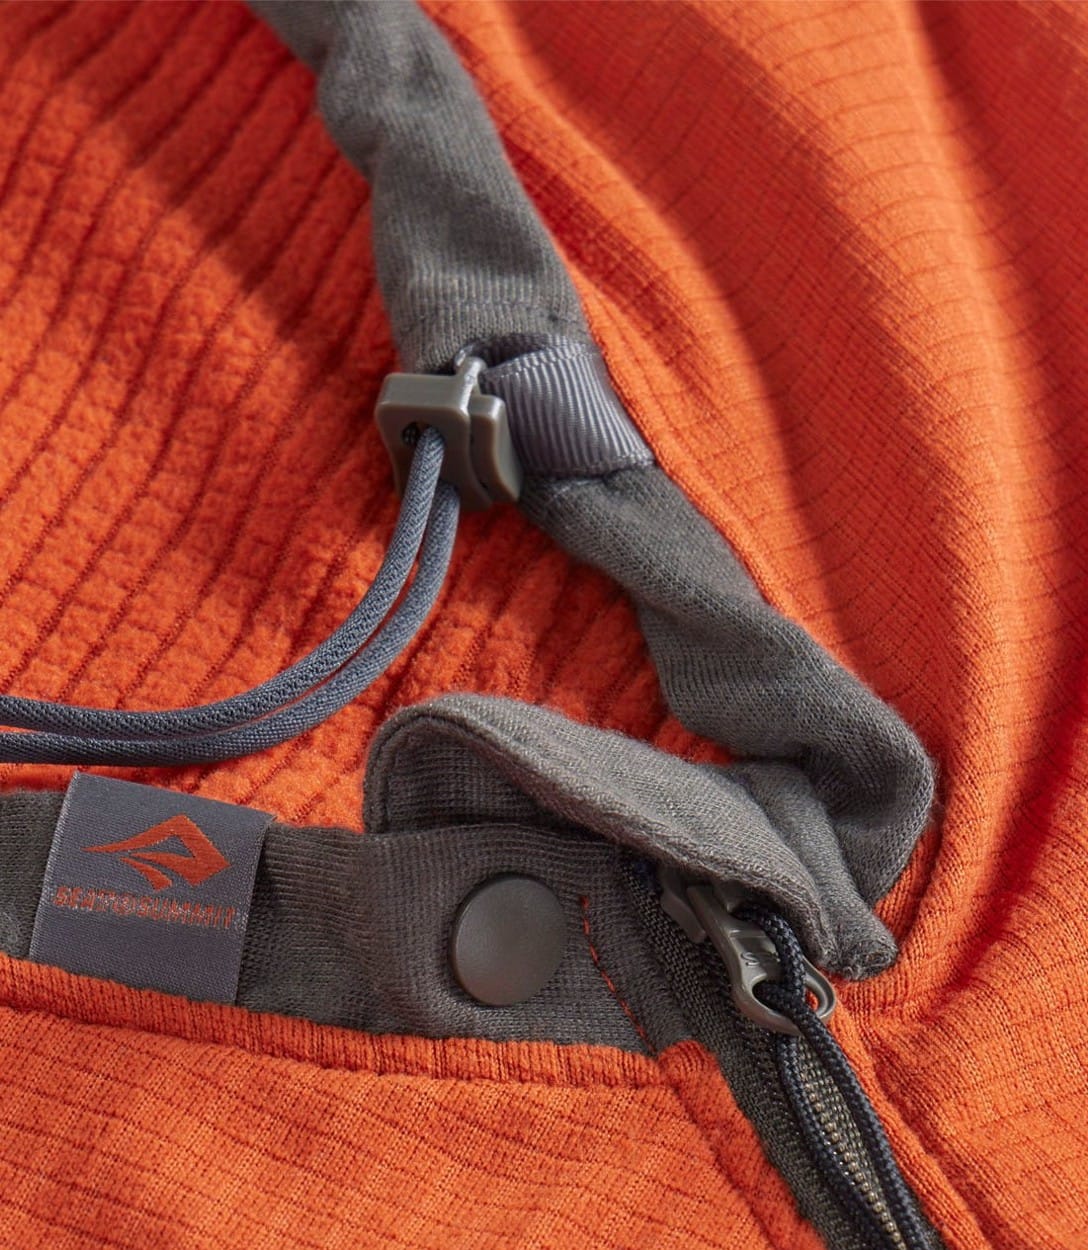
BUT THEN, I became fixated on this bag liner from Sea to Summit, which converts from a bag liner into a very stupid looking potato sack you can wear around camp. I figured if I'm going to the trouble to make my own, why not make something multi-functional.

This design would require some reverse engineering, to figure out all the little fasteners and connections.
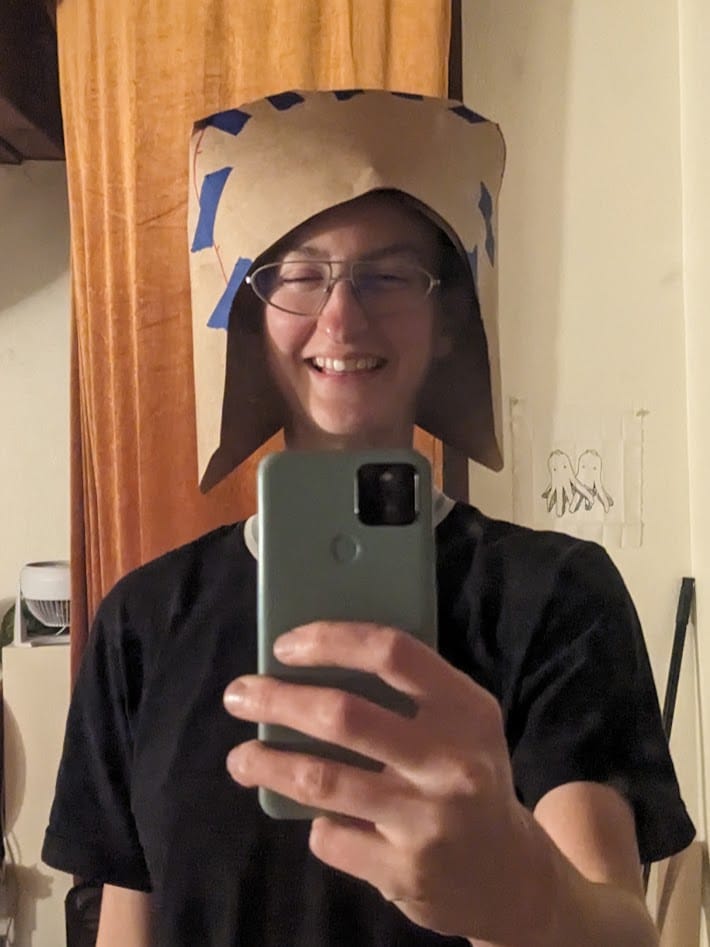
The head and arms part was especially complicated; hoods have been the bane of my existence every time I've tried to draw up a pattern for one. I stared the product images for several days until I finally started to understand how everything worked.
There are zippers on either side of the top, which unzip to become arm holes. At the top of each zipper is a tab with a snap, to hold the garment in place at the shoulder.
There were also 2 drawstrings to contend with, one at the bottom to free your feet for walking around, and one around the top of the hood to help it stay in place.
The Pattern
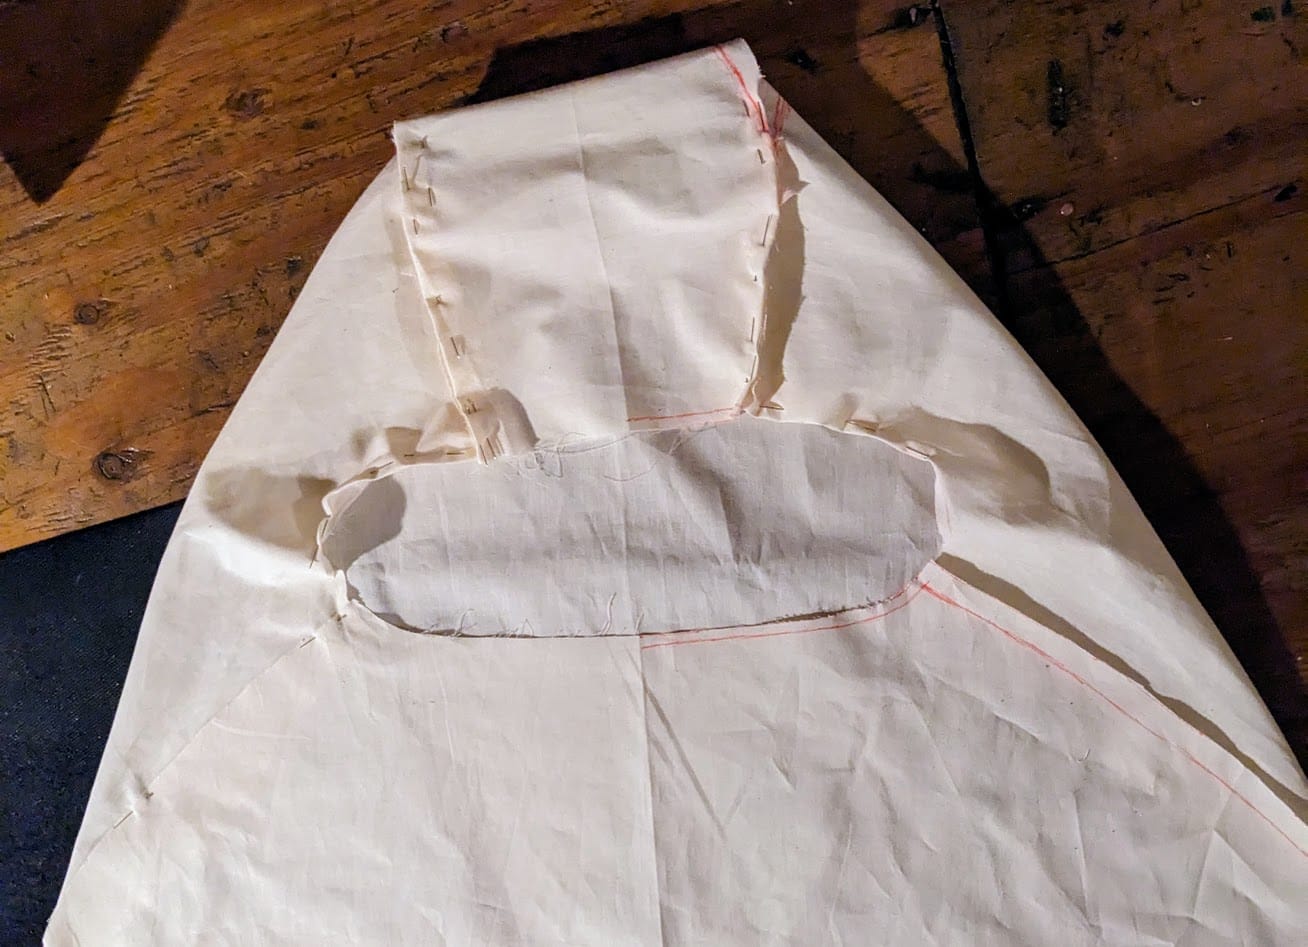
To make the pattern, I first traced the footprint of my sleeping bag, and marked out where the face hole was. I made a couple of modifications to the shape, narrowing the hood to make it fit snug around my head, and widening the bottom edge to accommodate the drawstring.
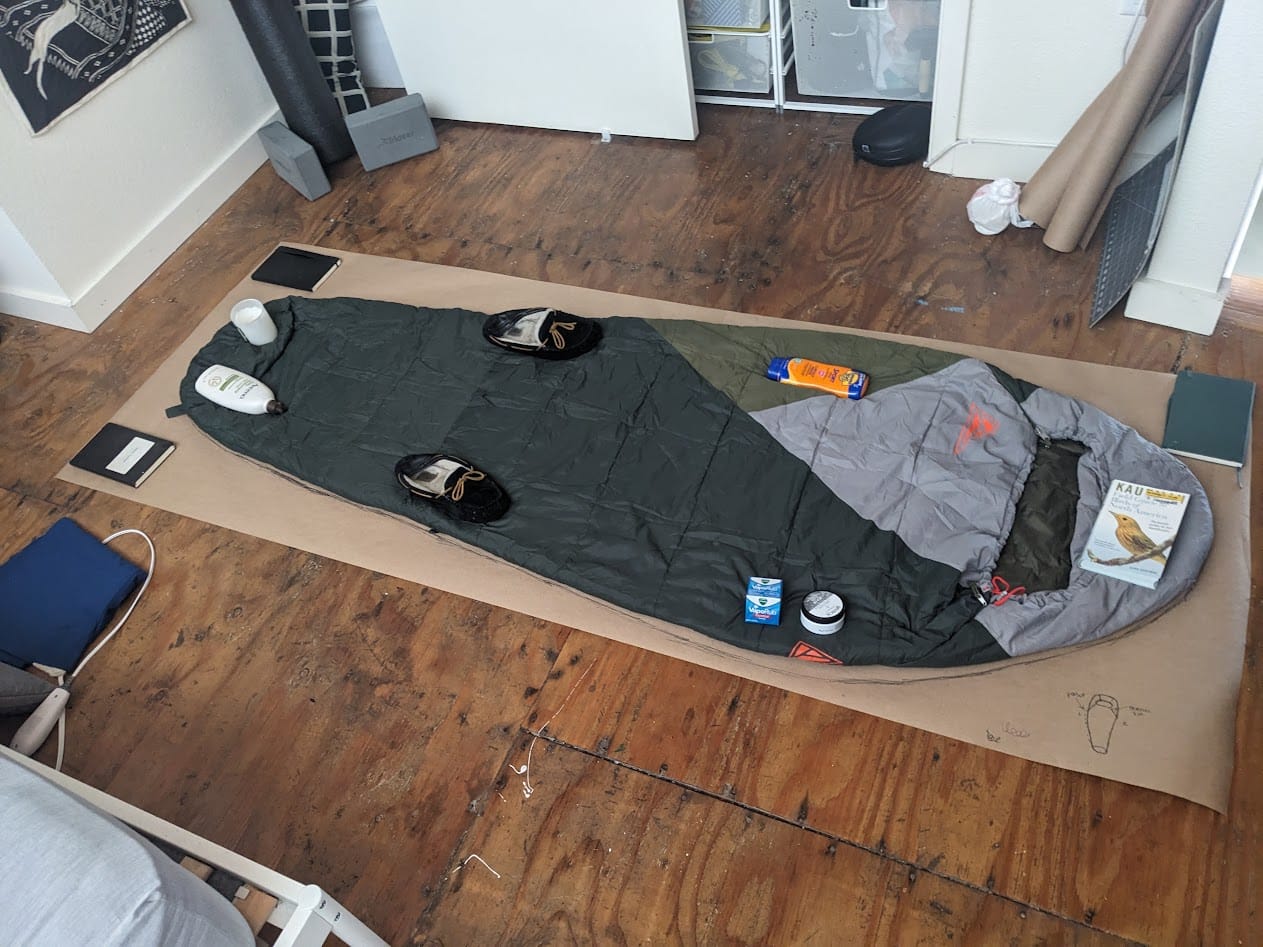
In the bottom image, green lines are the front piece - you can see where the front and back panels zip together at the shoulder. The purple lines on the outside of the hood shape are for the back piece - when they fold in they form the sides of the hood. (The top of the hood was a separate piece.) It took a lot of sketching and re-sketching, and some paper prototypes, but I finally nailed down a pattern I was happy with.
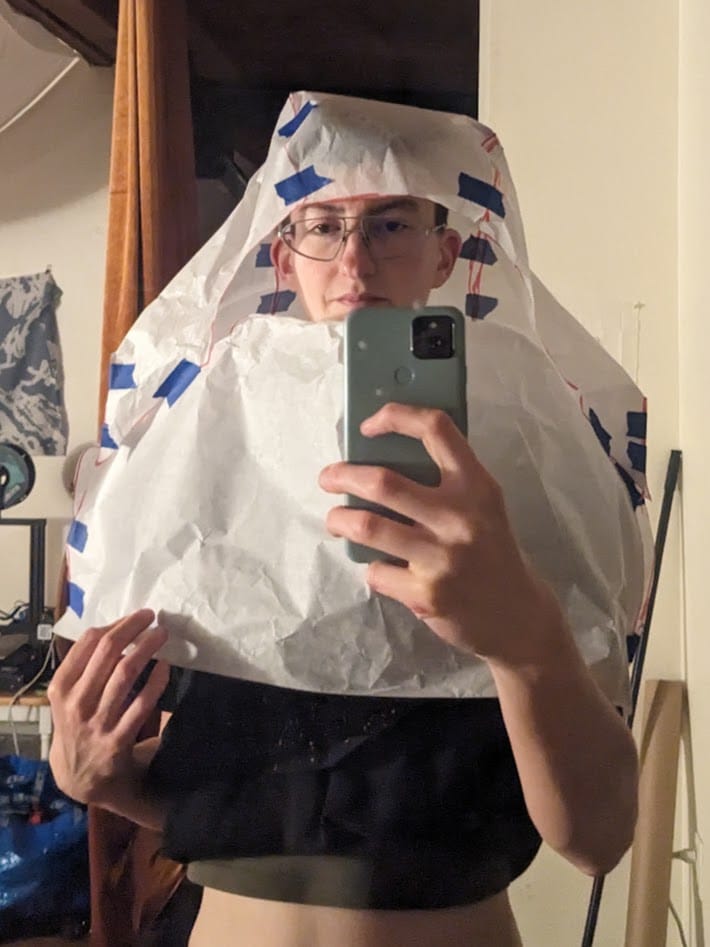
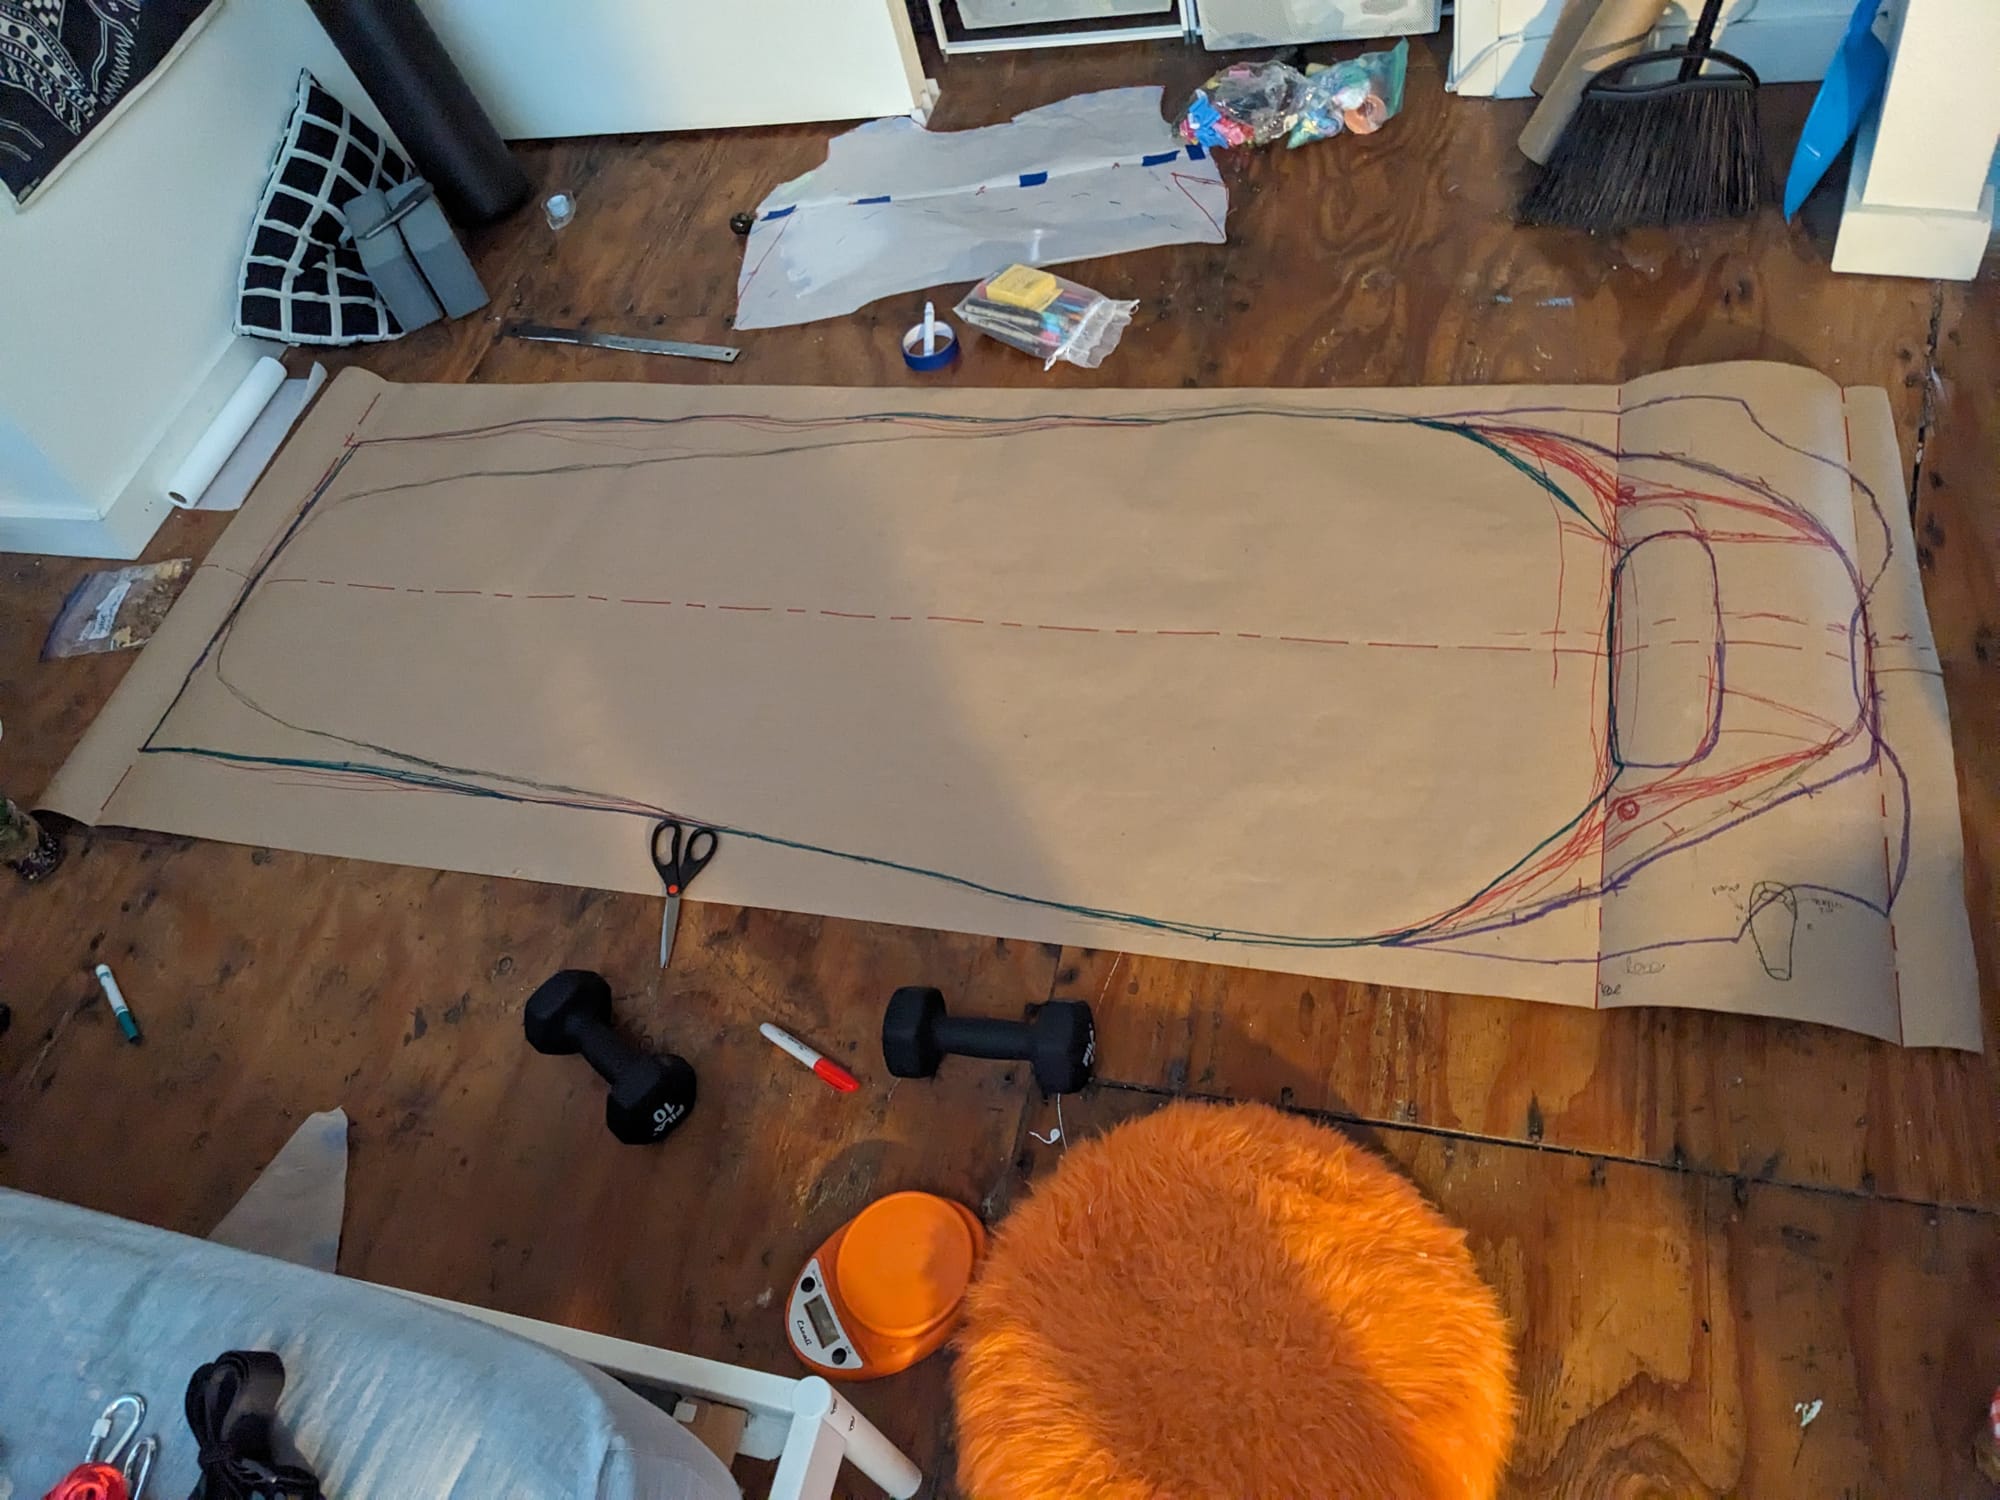
Hilariously, the pic on the right is pretty close to the final pattern.
Materials Quest
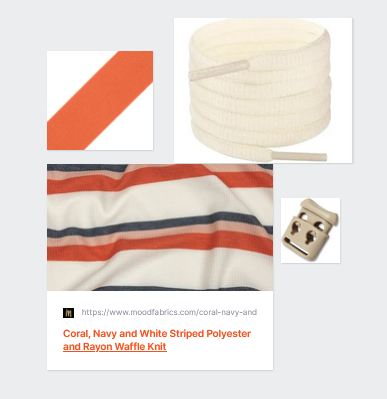
Sourcing materials and hardware was its own project. The example bag was made of some kind of technical thermal material (again, designed for surviving on Blizzard Mountain). I landed on this lightweight synthetic waffle weave from Mood Fabrics. This would allow it to fold up pretty small but still retain some insulating properties from the air pockets formed by the weave. Basically long underwear for your sleeping bag, that you can wear around like a big goofy poncho.
The fabric was deadstock, which I was happy about. We overproduce textiles to a truly appalling extent, and I have begun trying to make more sustainable choices for my sewing projects.
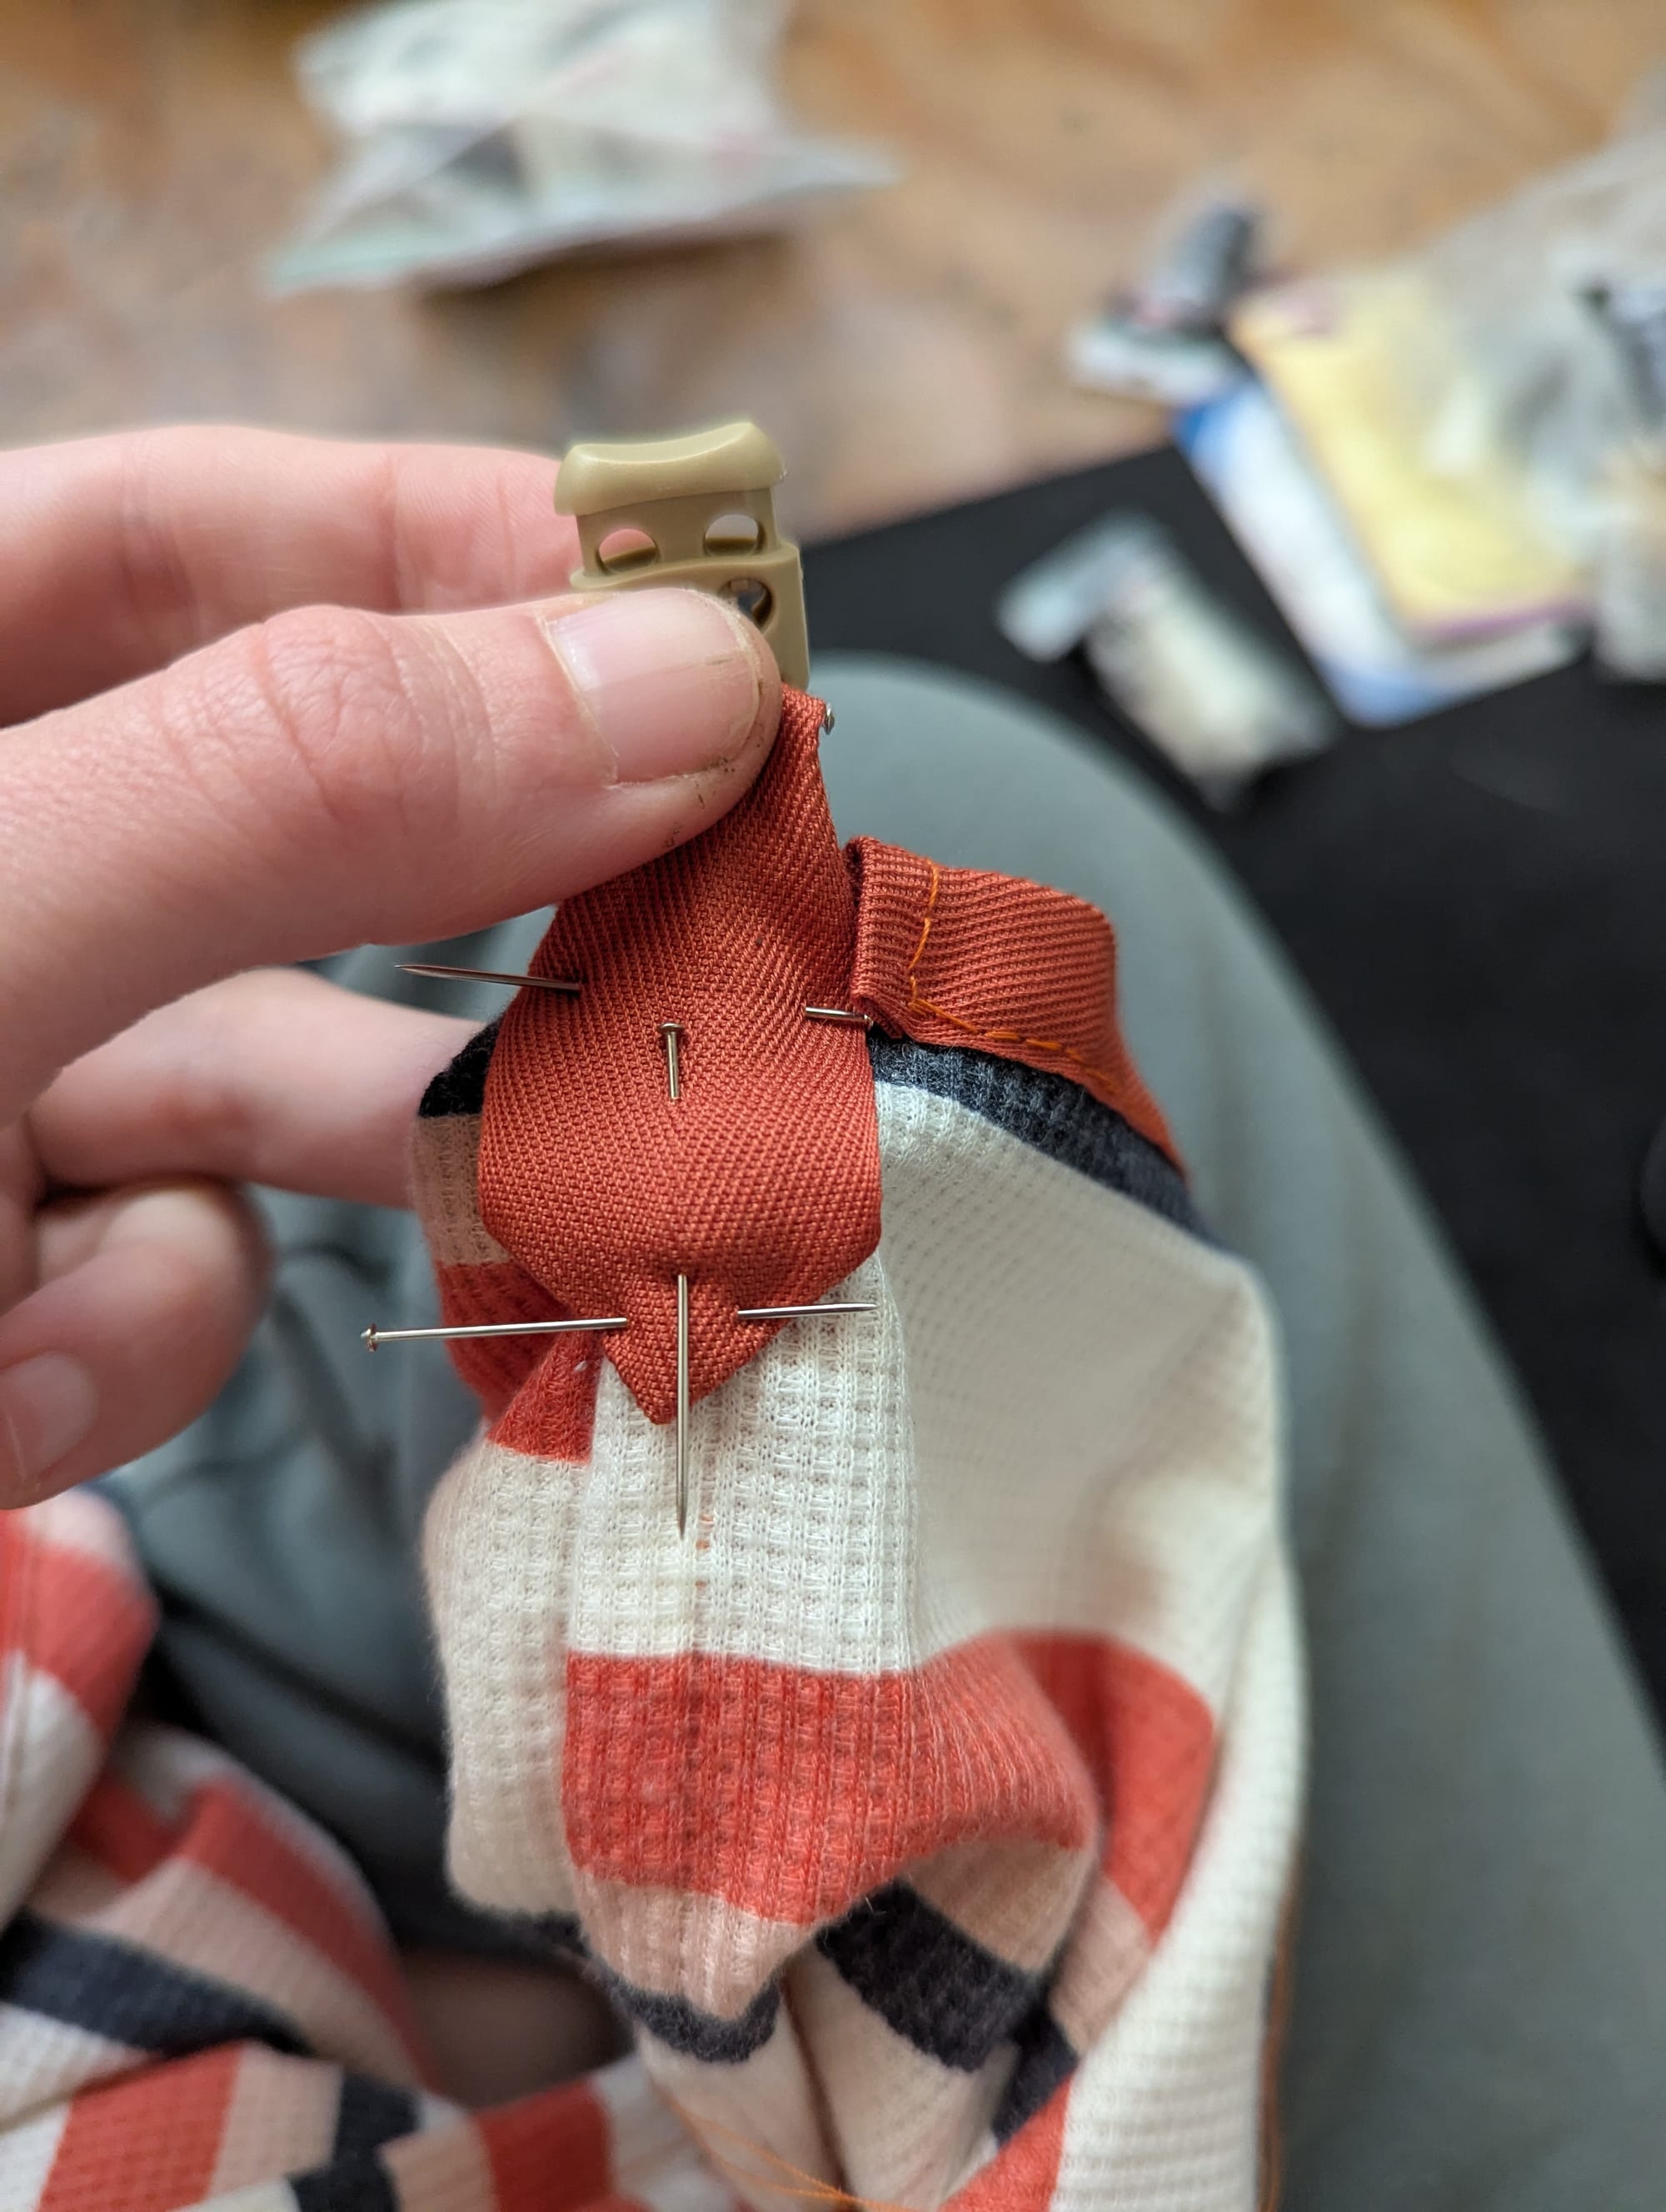
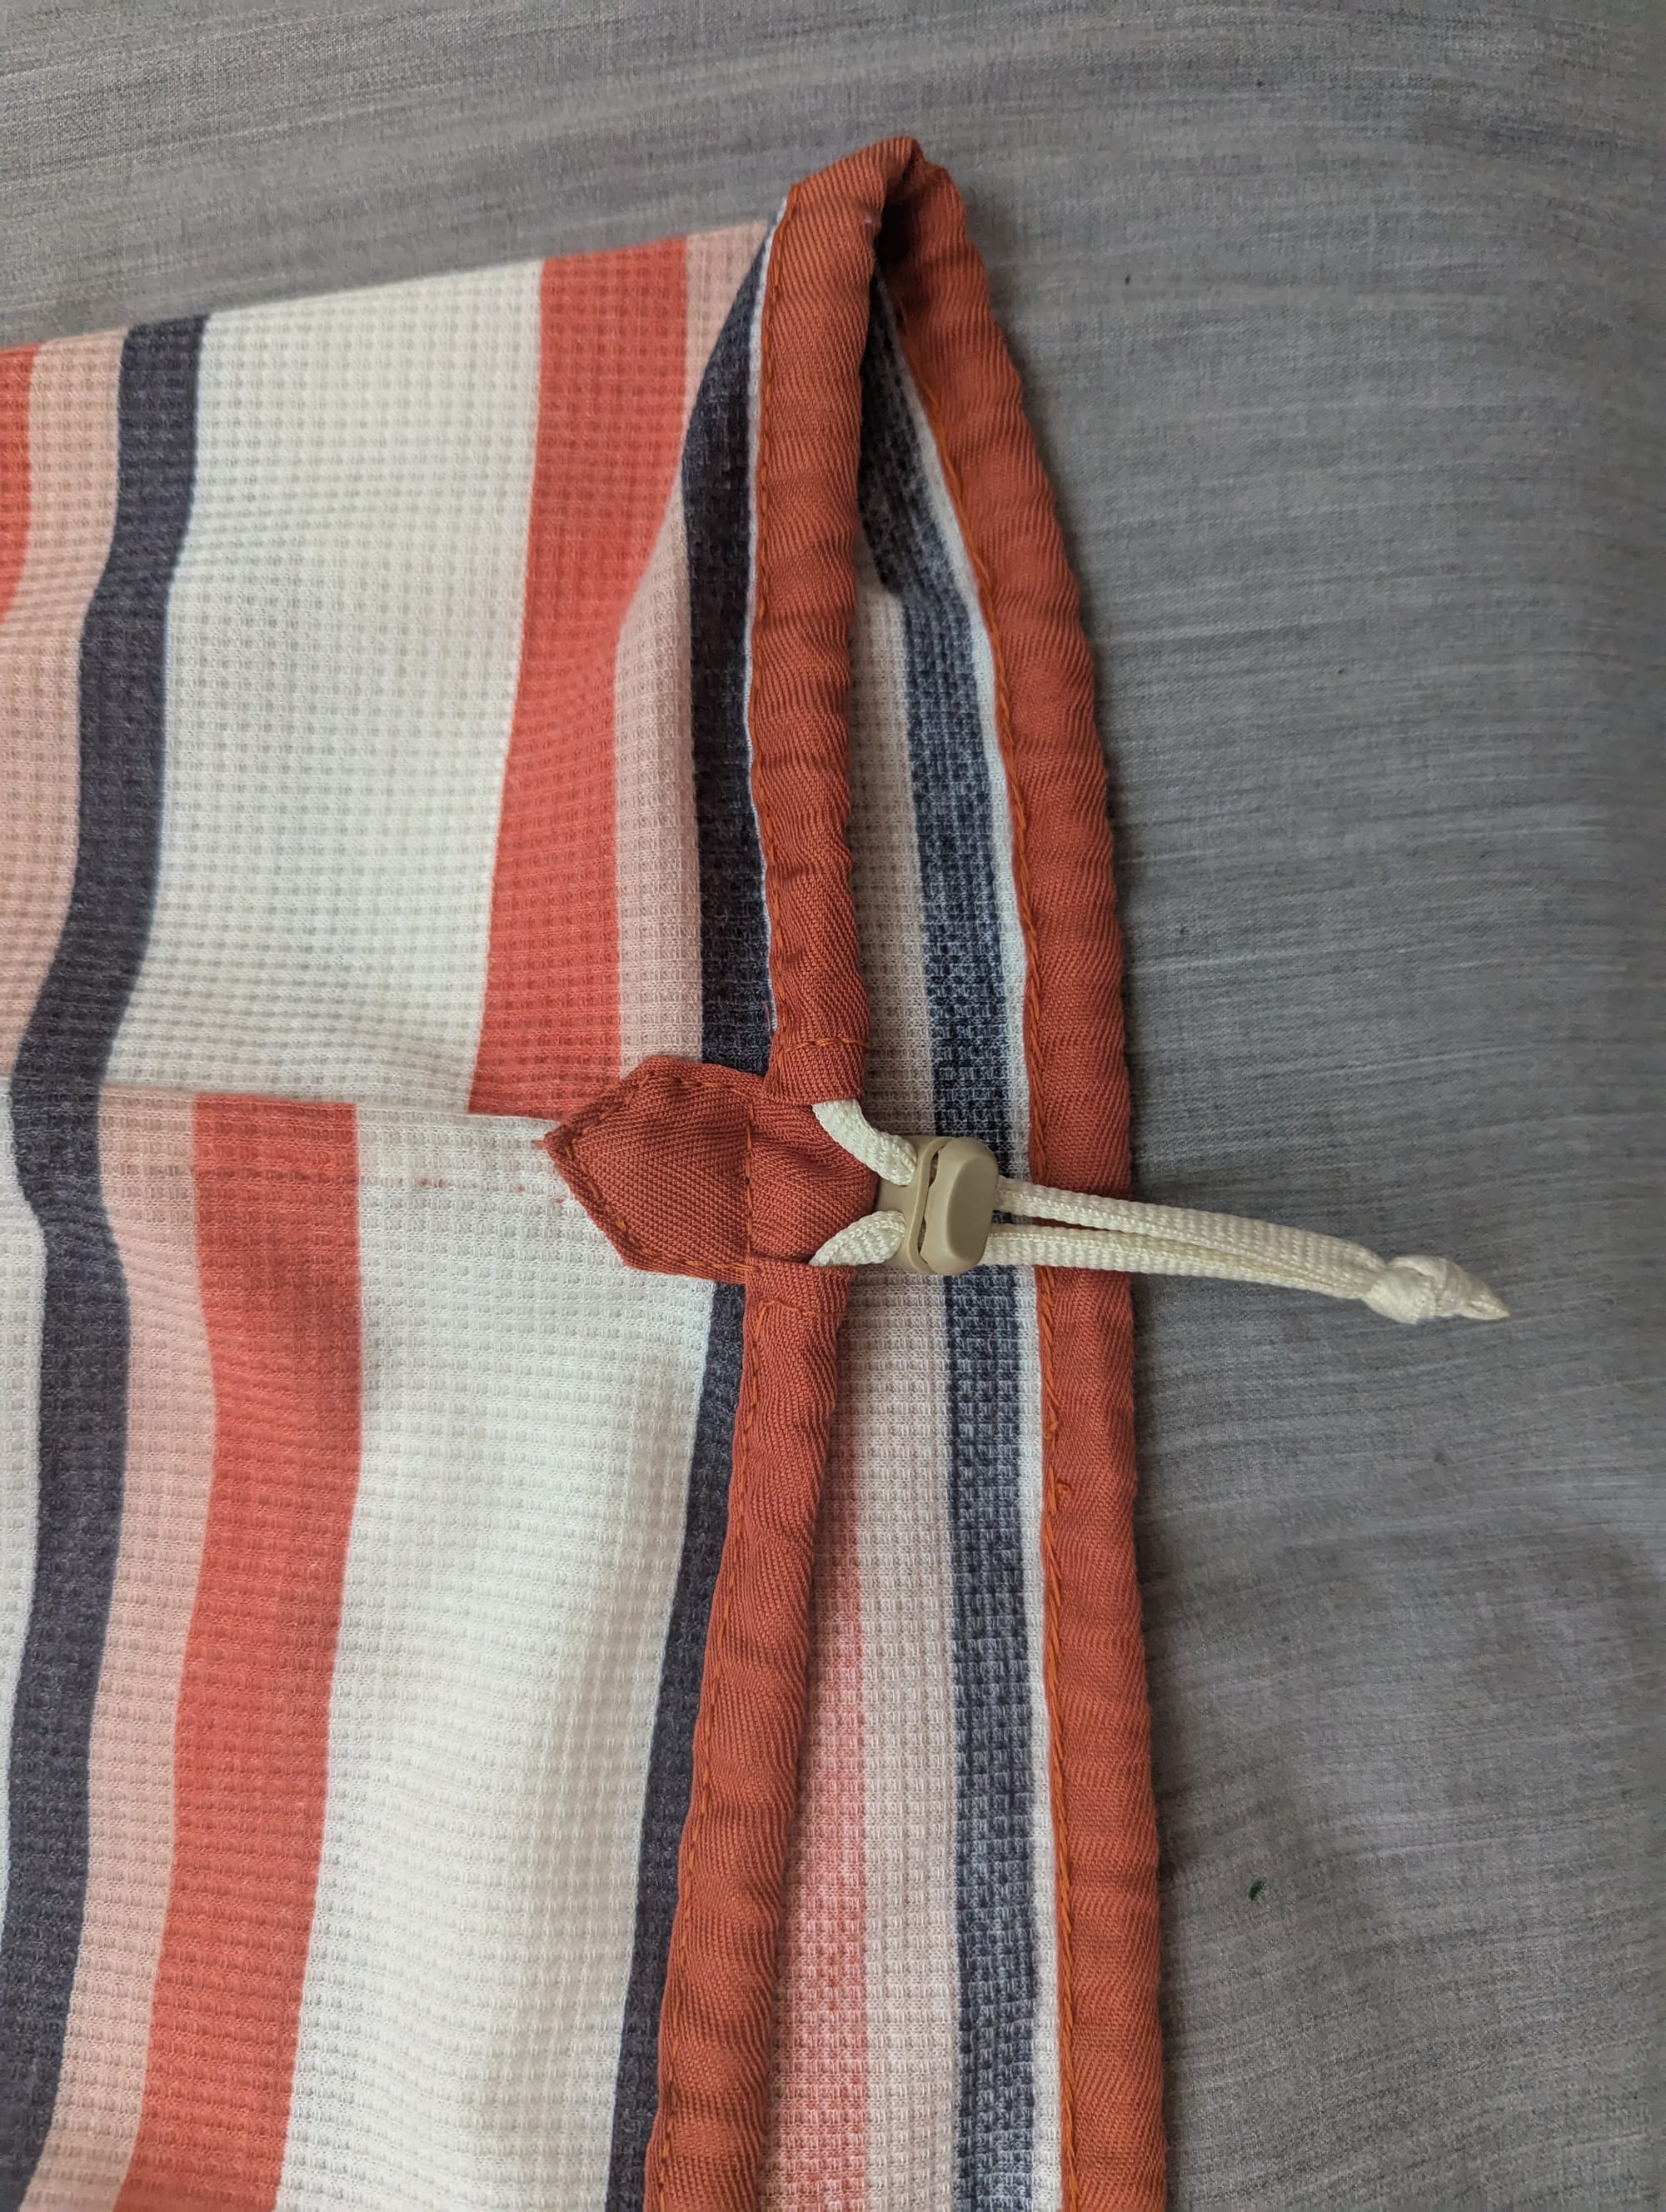
I got some 1" twill tape to use for the drawstring channel and trim, folded over and sewn to the edge of the fabric. For the drawstring itself I wanted something sturdy and lightweight, but also soft. I didn't want to use elastic cord because I thought it might be uncomfortable around my face and feet when the drawstring was closed.
I landed on... shoelaces? I bought a 72" pair of synthetic oval laces from the evil online megastore. I'd cut off the plastic aglets and finish the ends with a knot and a lighter. I discovered that they were made of an outer woven layer, with an internal layer of stringy, flosslike material to make them puffy. I pulled out this inner core to reduce weight and bulk and make them even softer. The outer layer seemed plenty strong by itself.
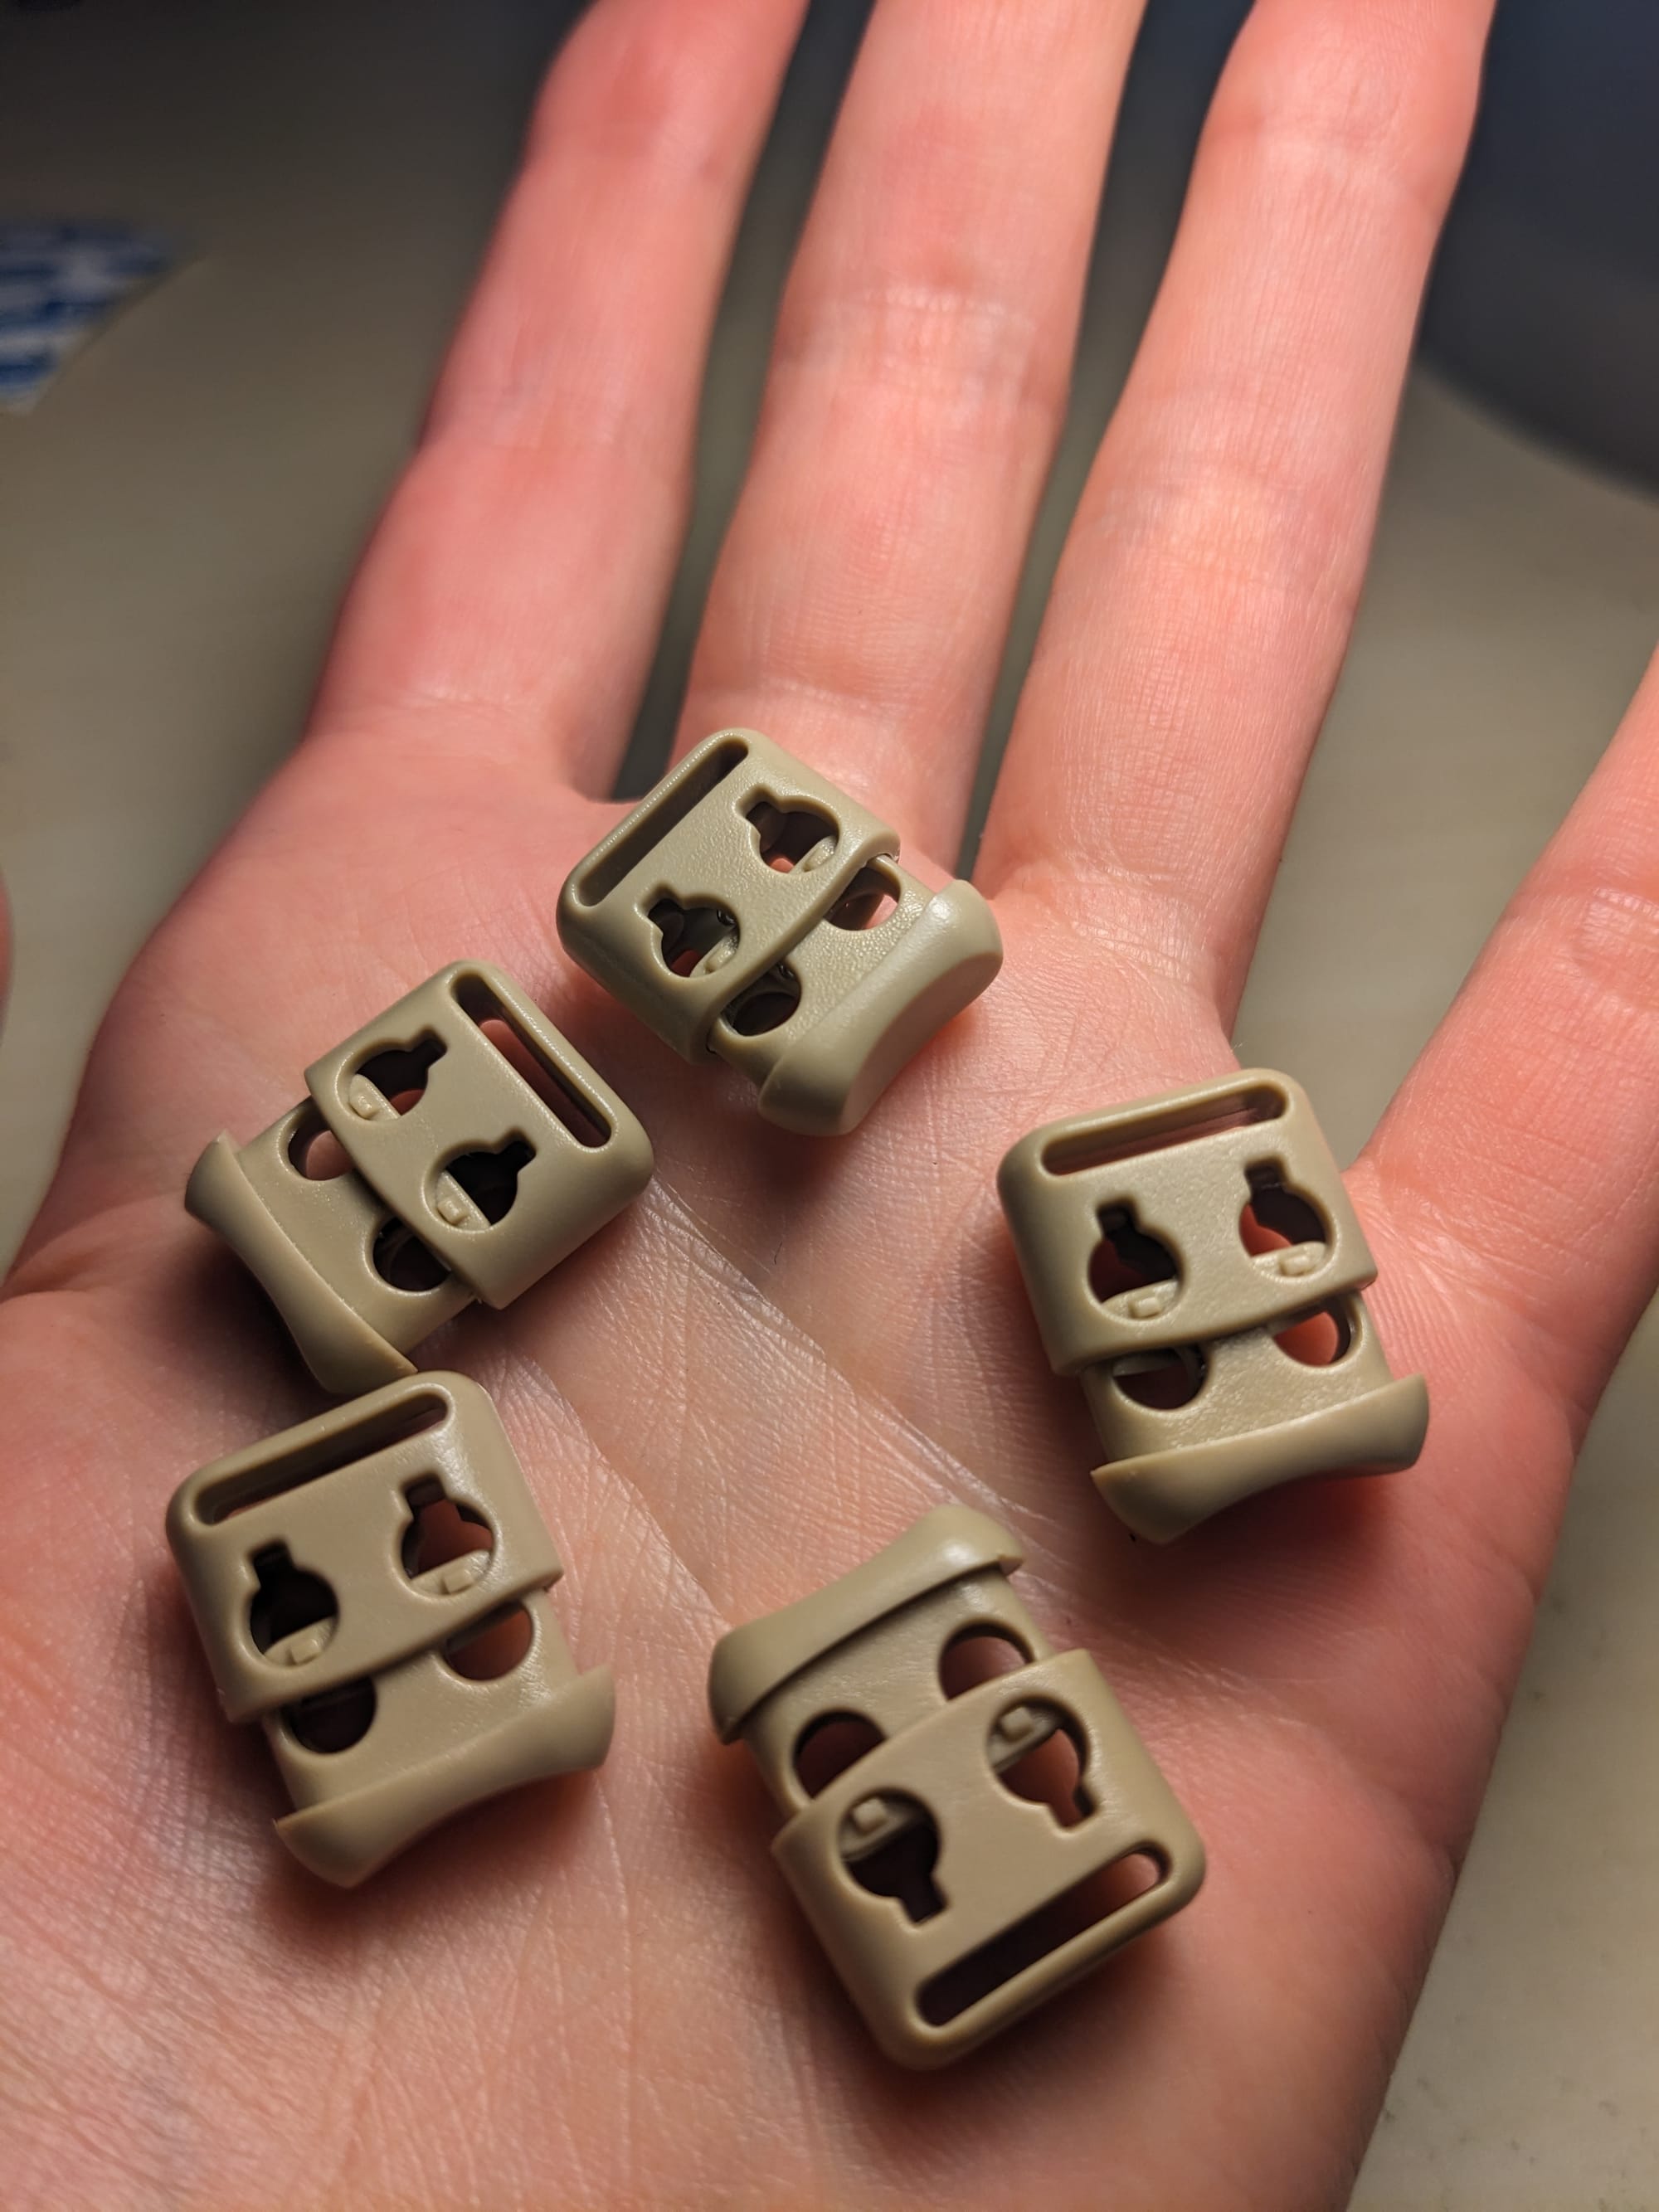
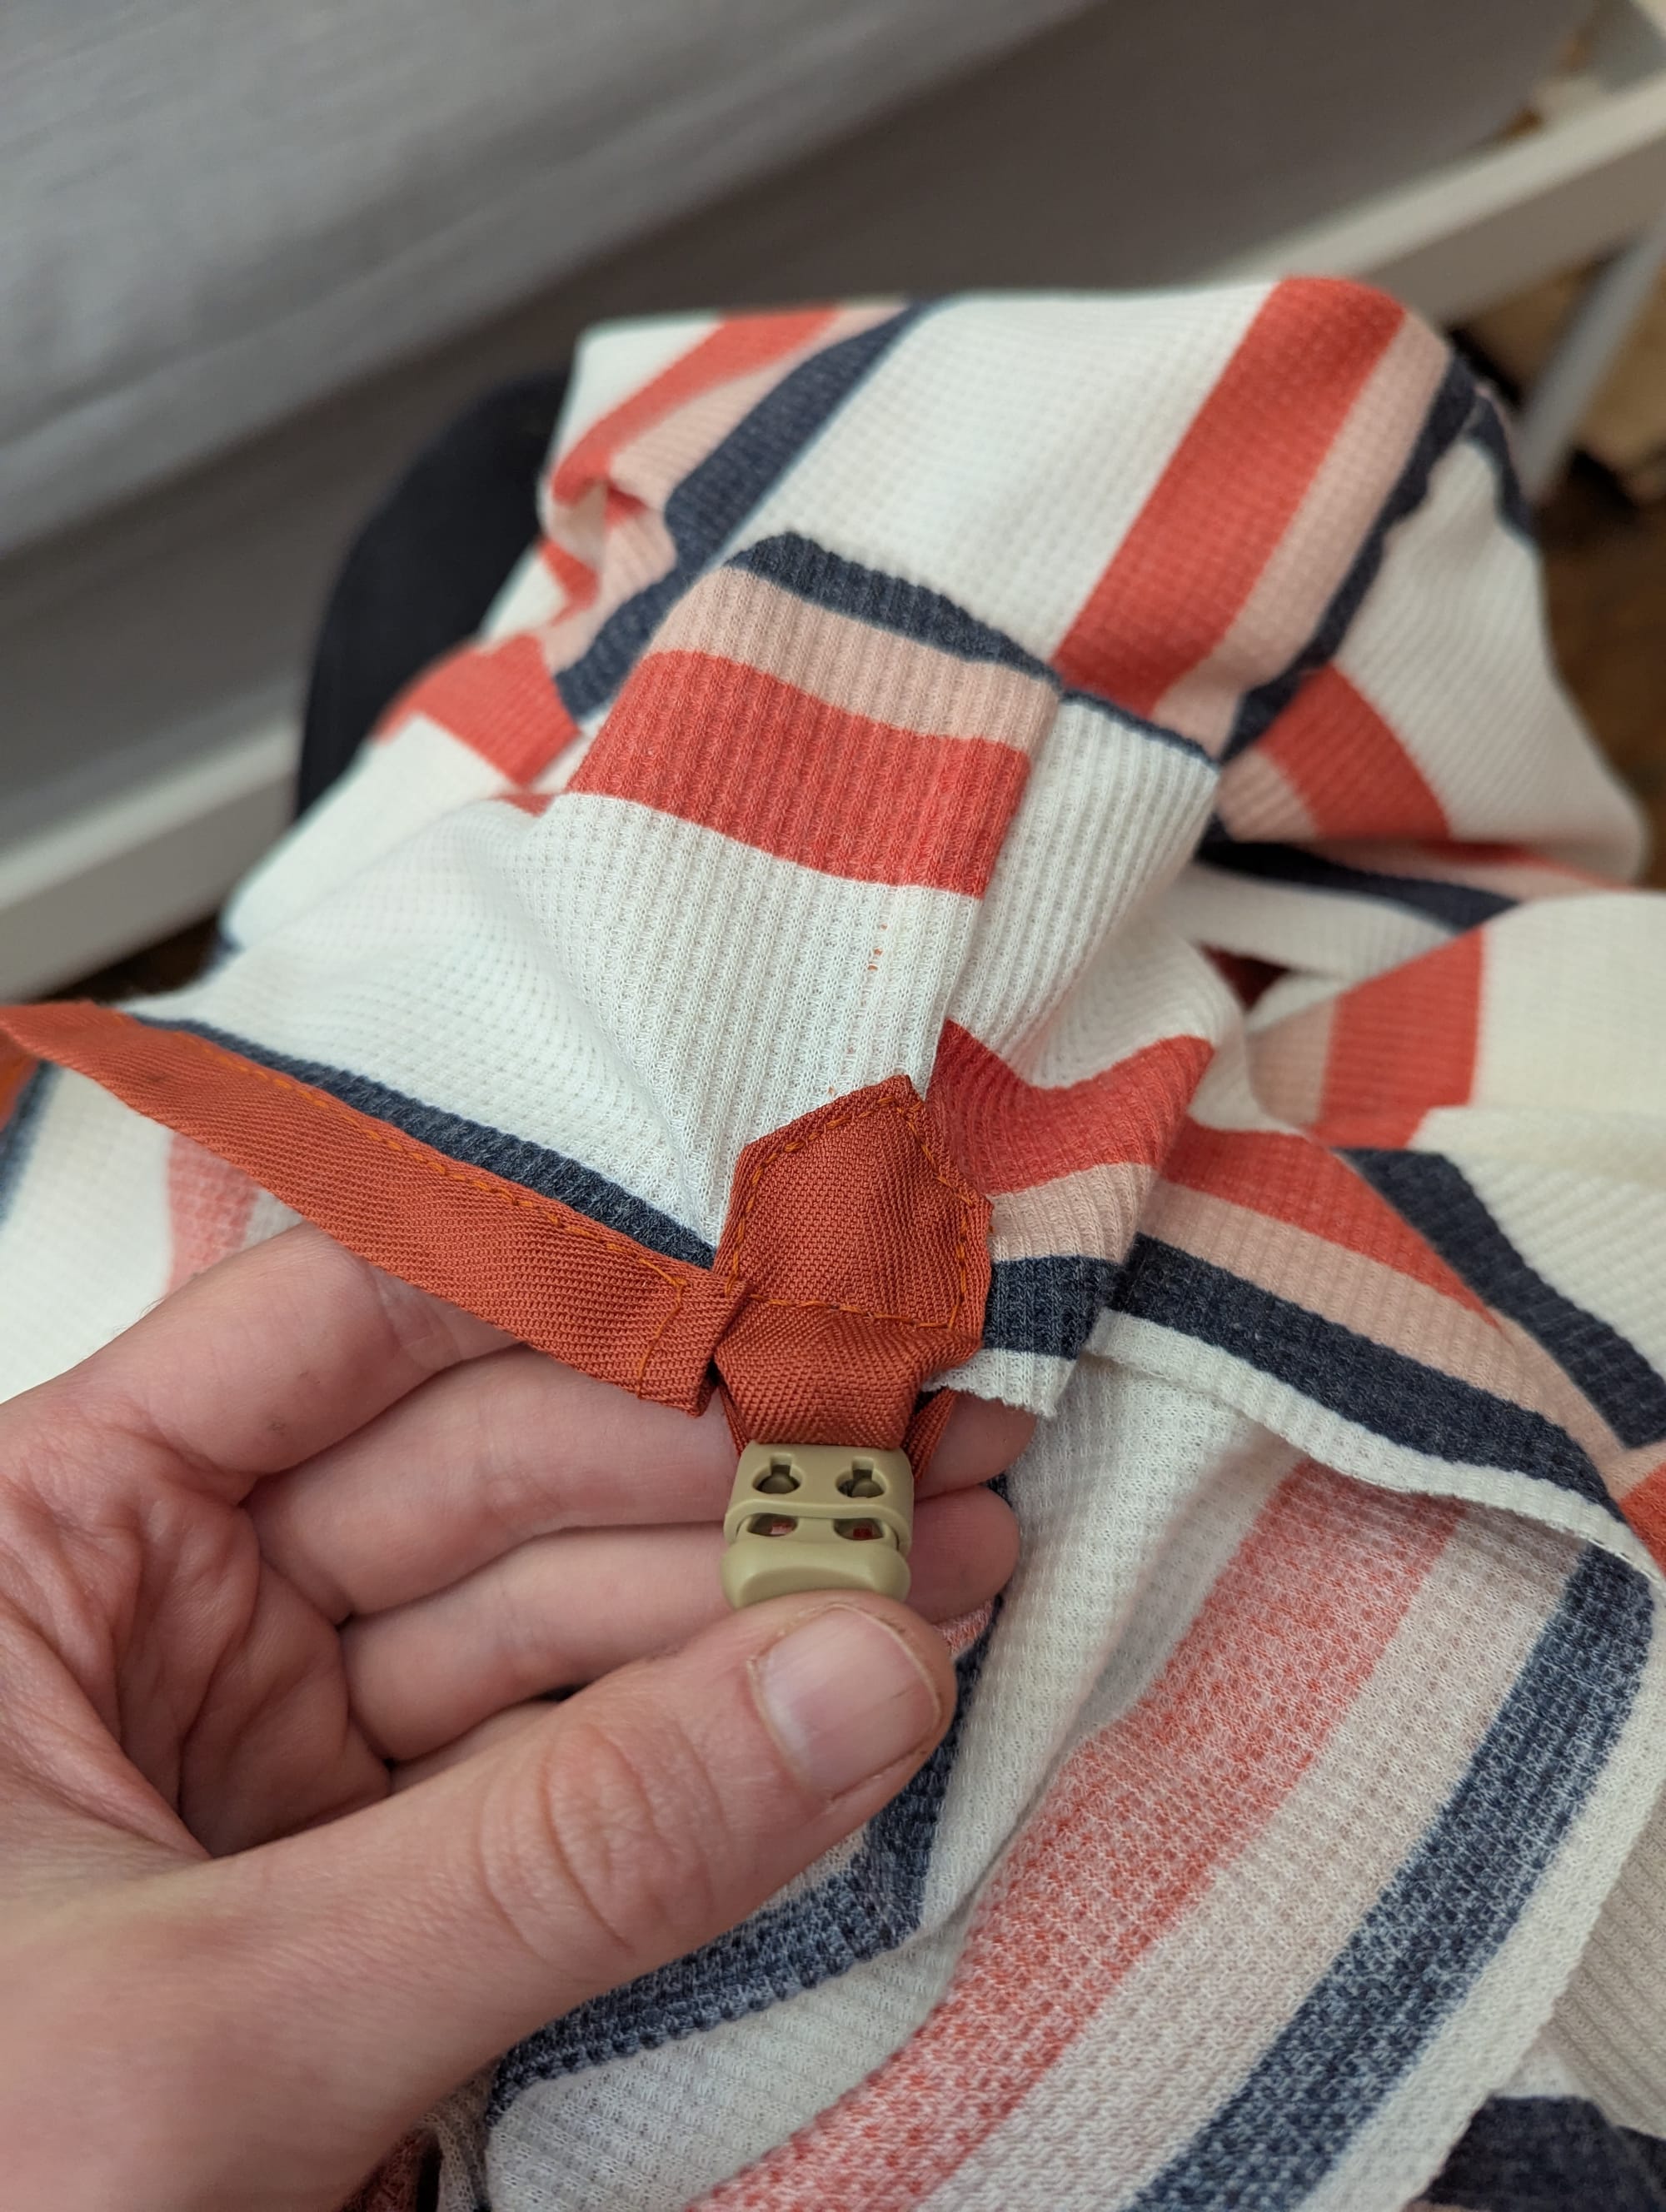
I also noticed that the drawstring hardware was attached to the bag at the drawstring channel with a tab. This was a nice detail, and I decided to replicate it.
I didn't know the word for this piece of hardware, or what they call the version with a slit for attaching it to a garment like the example.
On my other make-your-own-gear adventures, I've learned that if you are willing to put in the time of throwing random descriptive phrases at google until you figure out what the thing is called, you can almost always find the thing. I eventually found out that these are called cable locks, and by adding "anchored" to the search, I was finally able to find ones with the slit at the end.
The Mockup
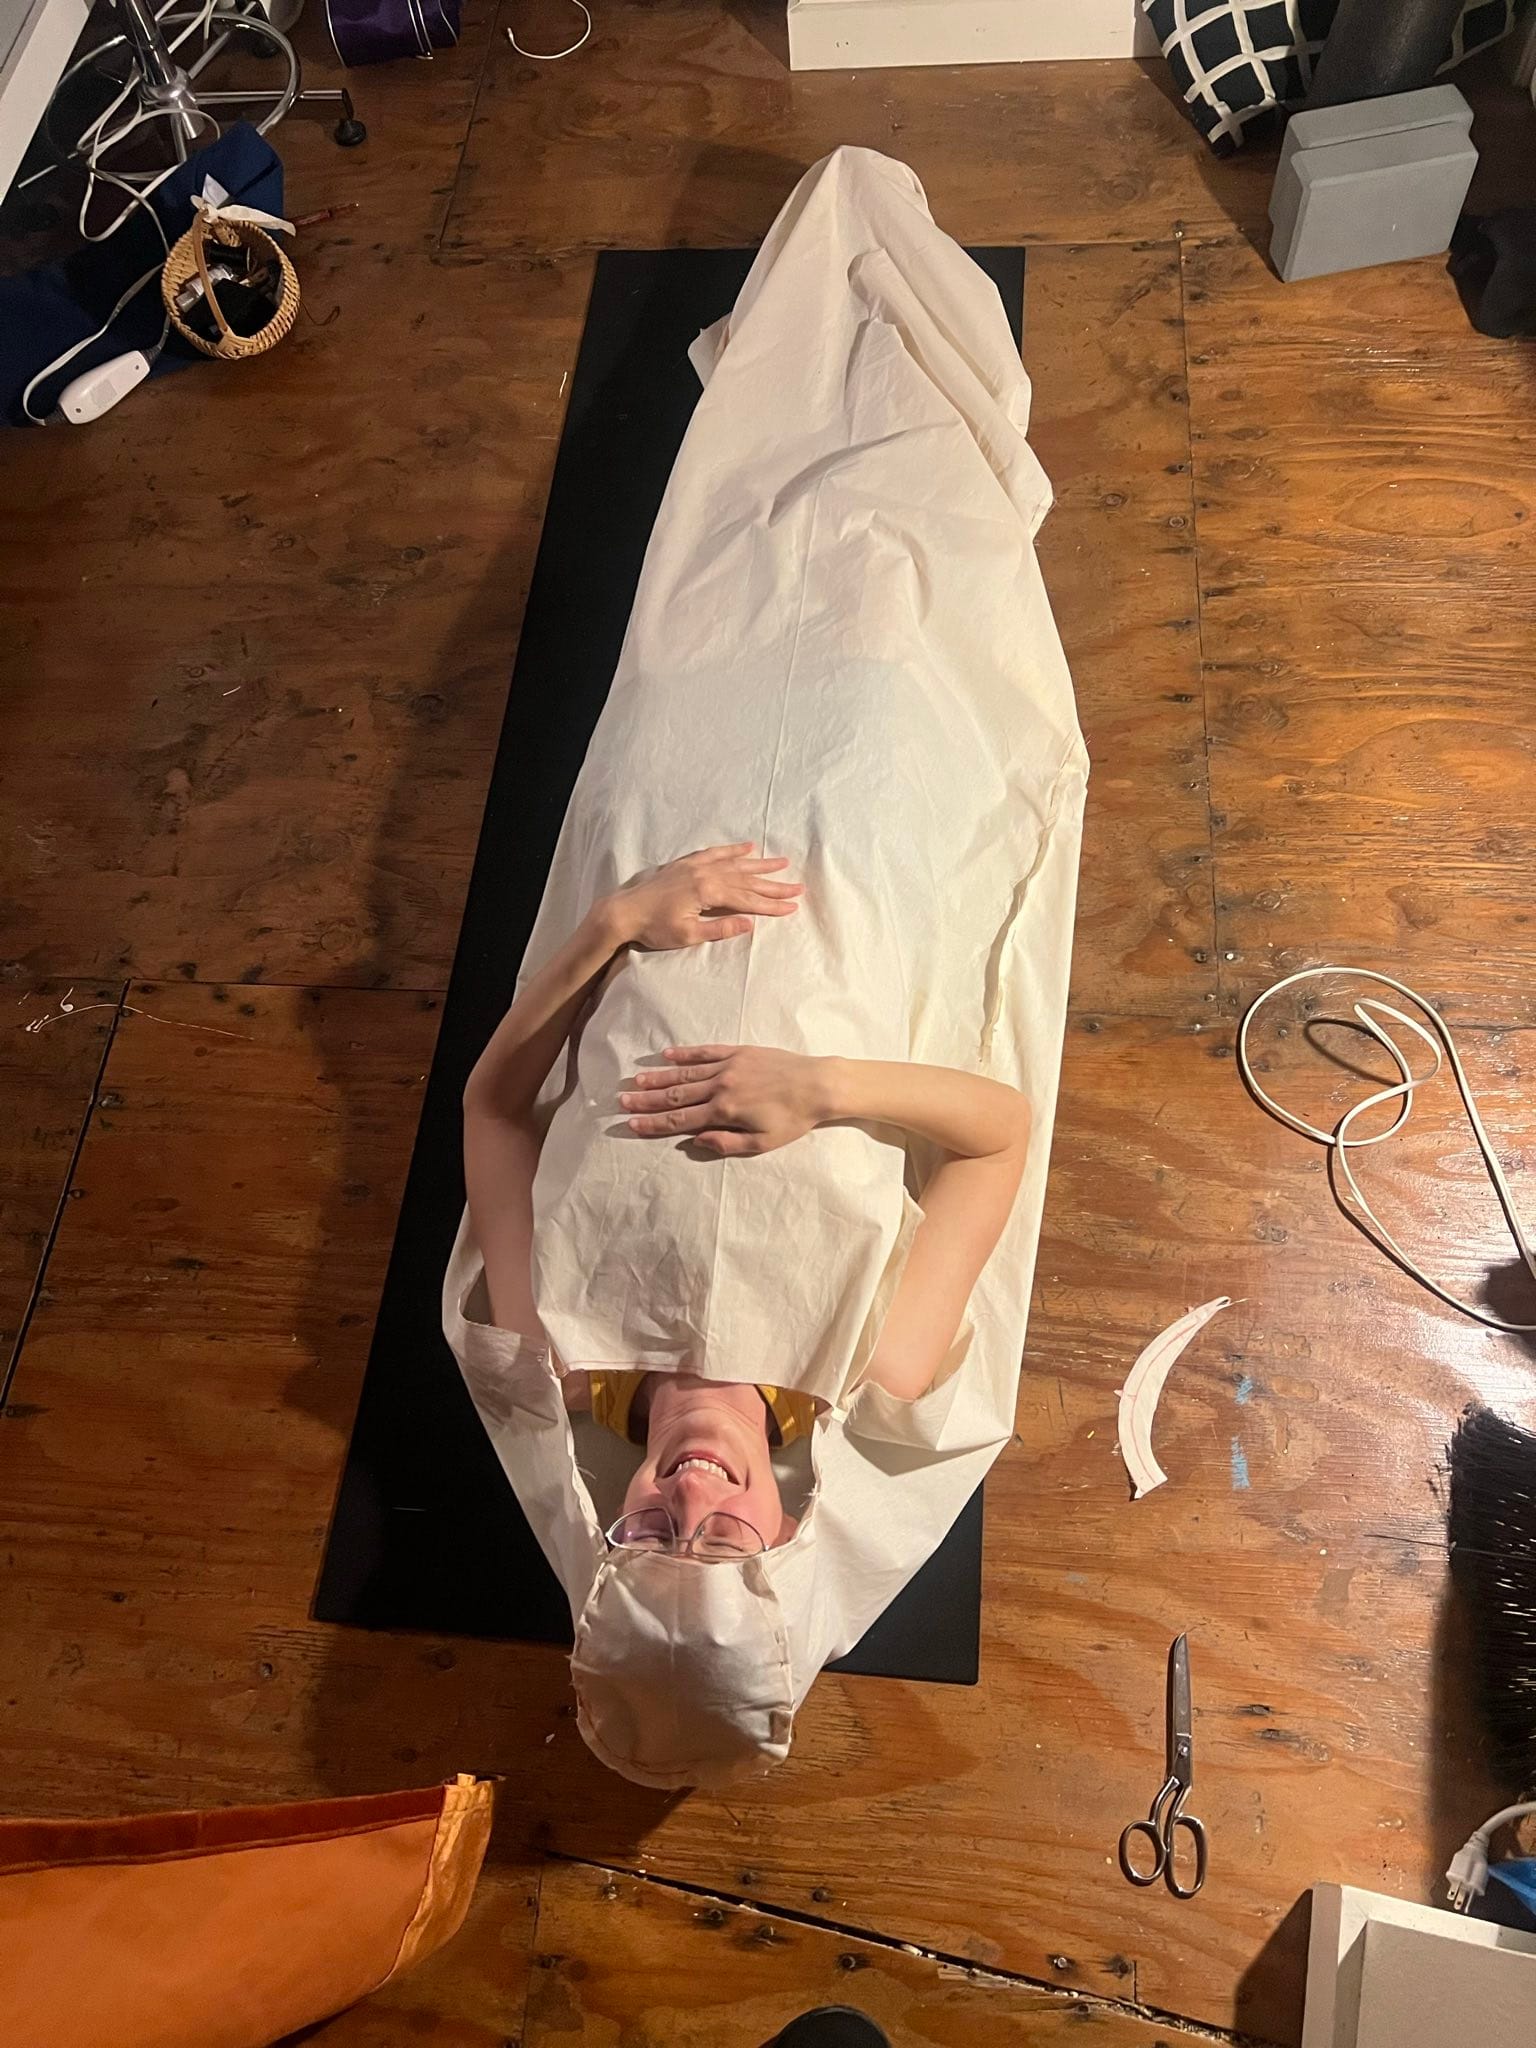
I bought a 5-yard pack of muslin from Mood along with the main fabric. I figured I wouldn't be able to get the hood just right until I was able to fully try it on.
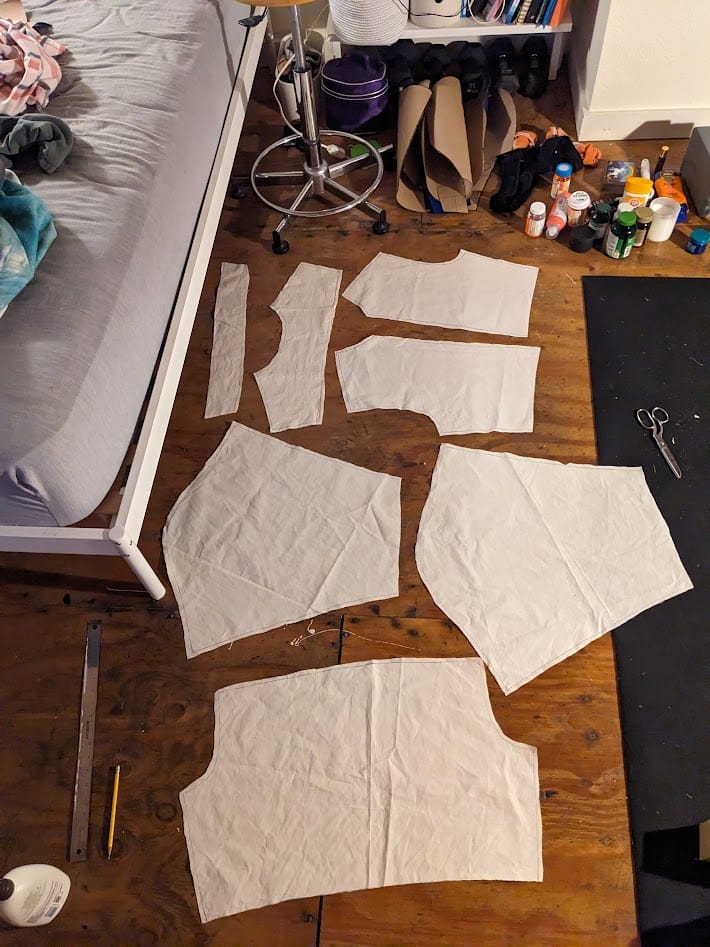
I traced the pattern onto the muslin, cut out the pieces, and pinned them together inside out. After trying it on, I made a few adjustments here and there, mostly to the hood and shoulder areas.
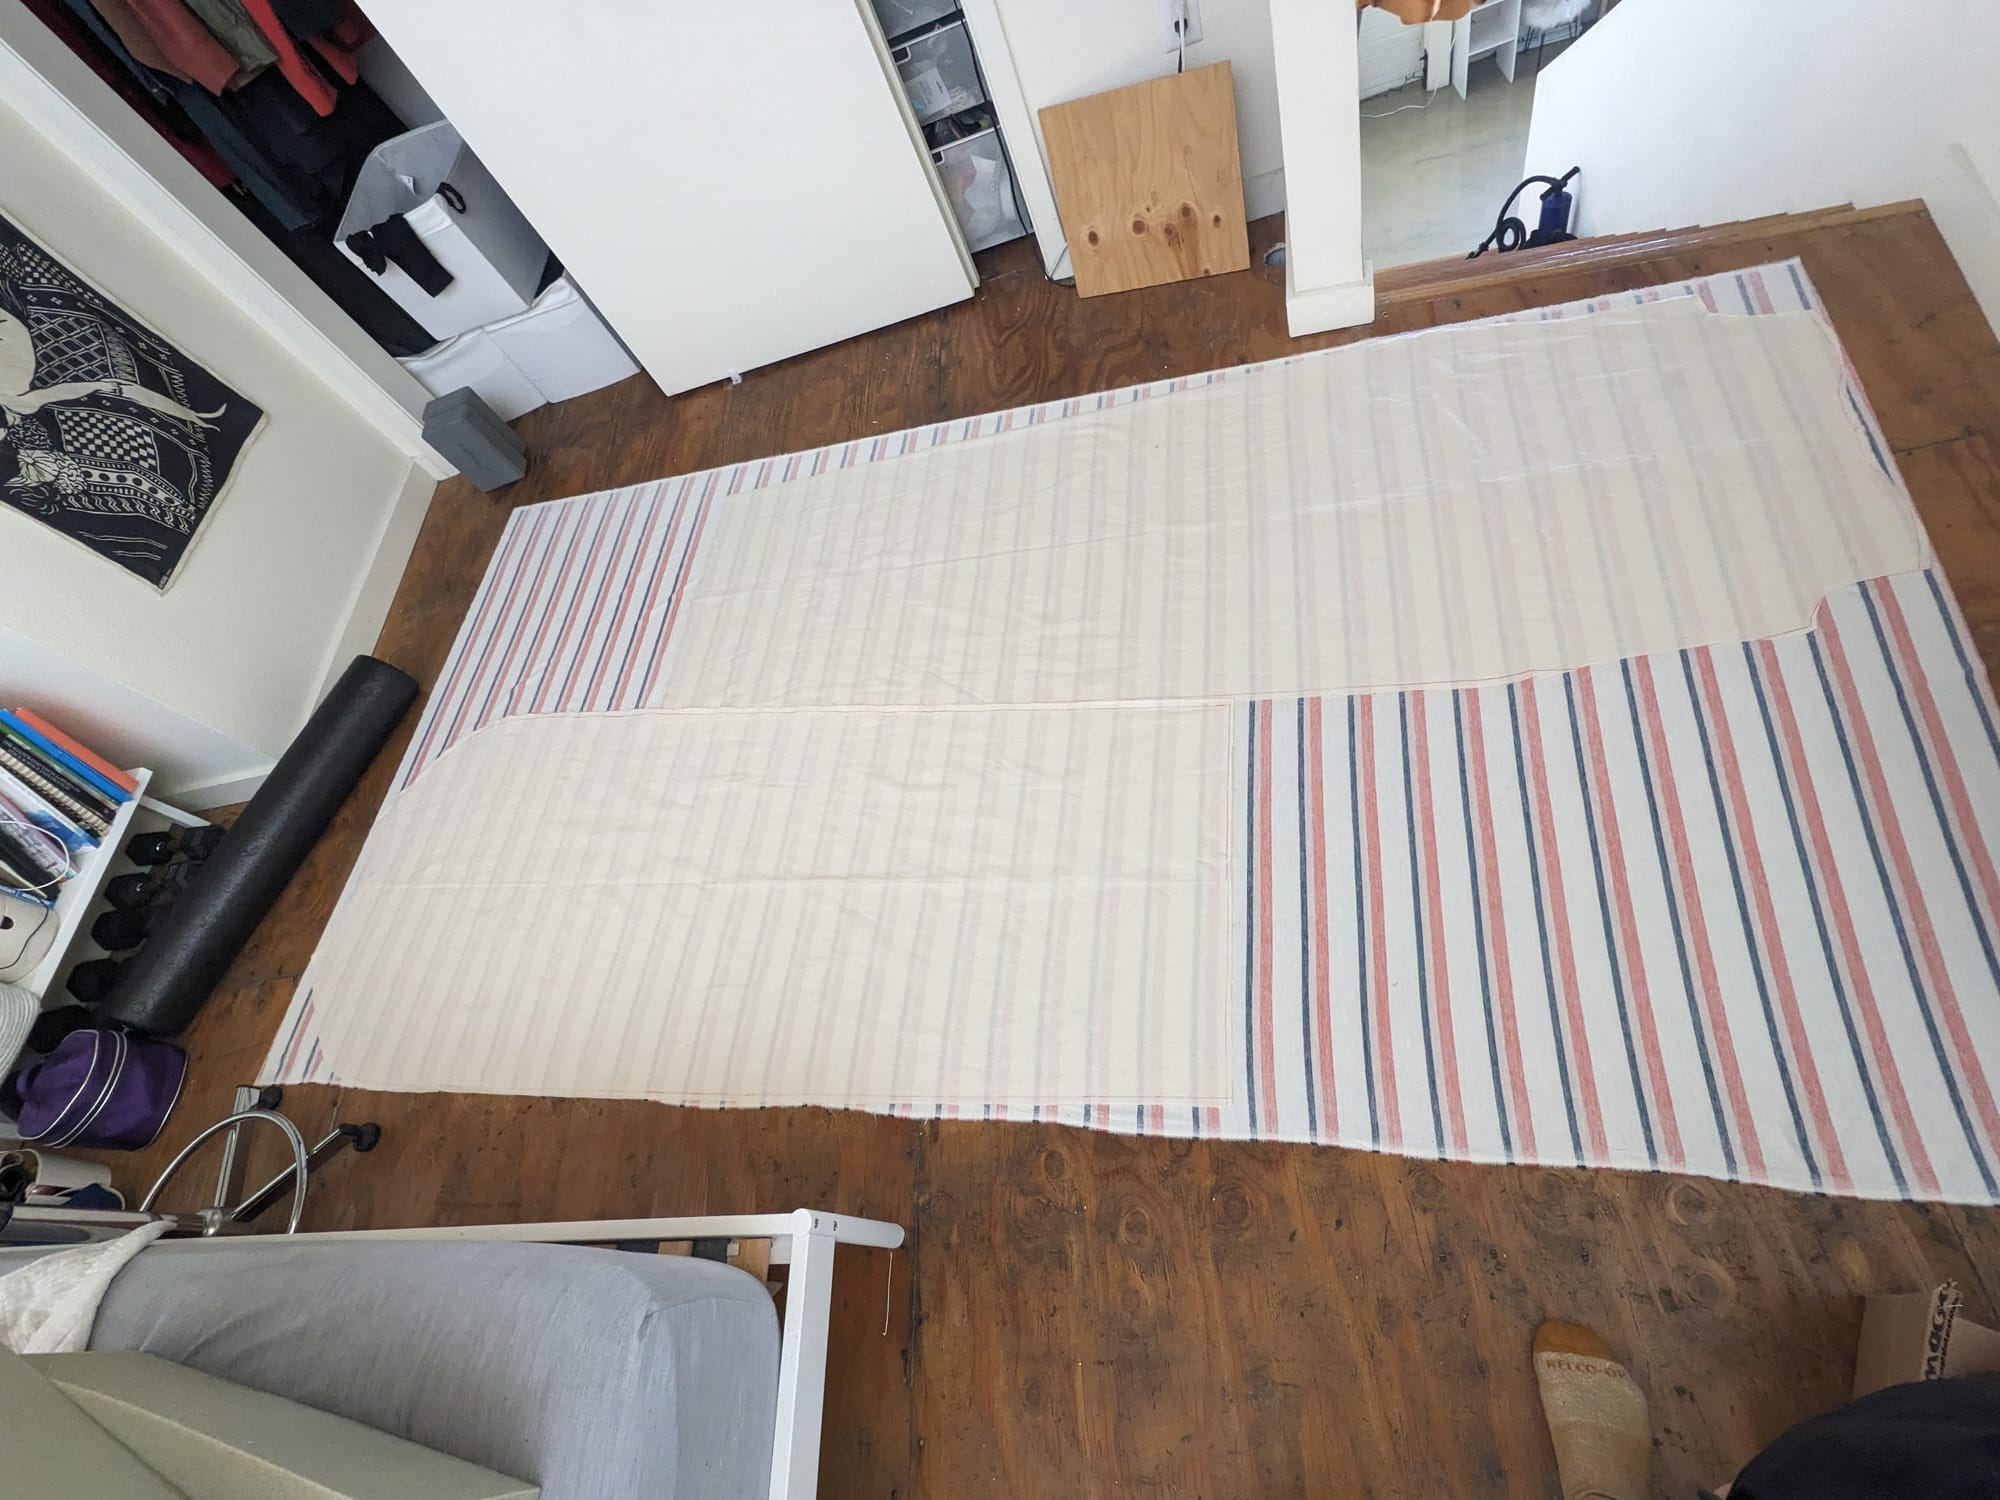
I finally got a shape I was pretty happy with, and then it was time to cut the fabric! I almost couldn't get the two main pattern pieces to fit side by side - I couldn't fudge it and rotate them slightly because I wanted the stripes to be perfectly horizontal. In this pic they still overlap a bit; ultimately I ended up rotating the pair of them 180°. I don't know what dark magic was at play here, because somehow this way they fit, with room for seam allowances and everything.
It almost felt wasteful at first to use that much muslin, but the two main pieces were large and rectangularish enough that I was later able to use them for all the pattern pieces of a jacket project I'm working on.
Construction
I should mention if I haven't before that I sew everything fully by hand. As in I don't even have a sewing machine.
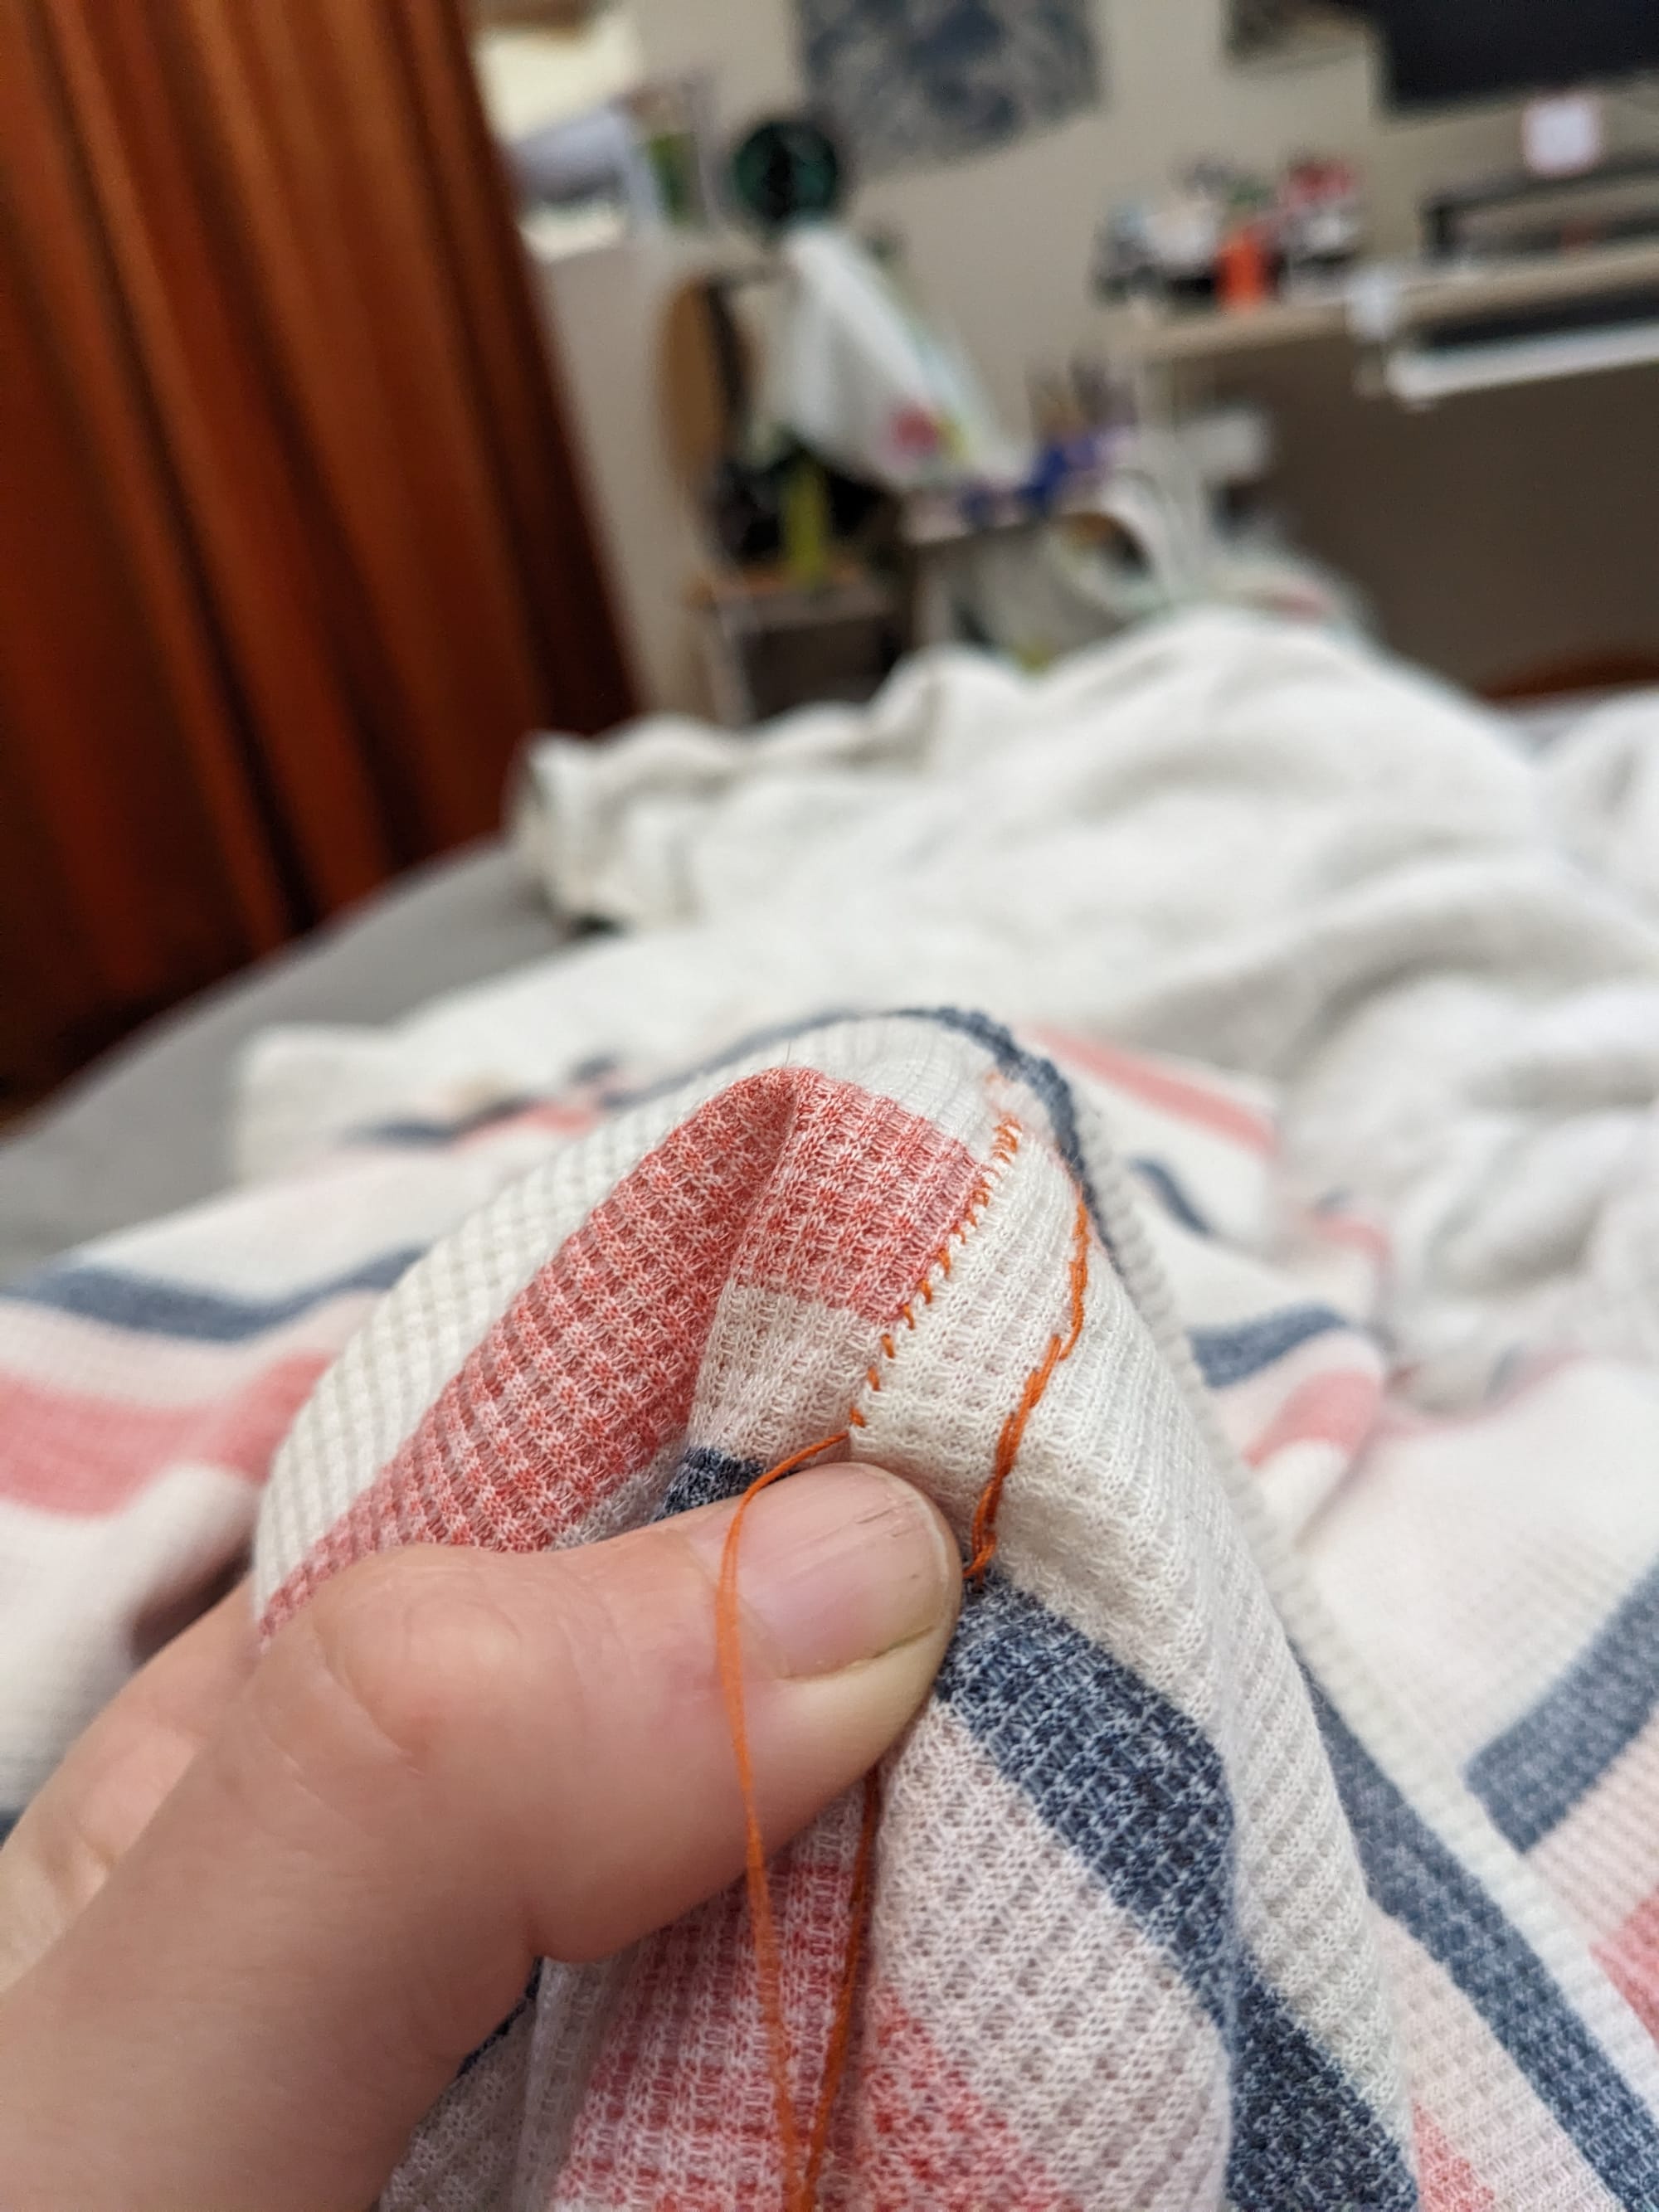
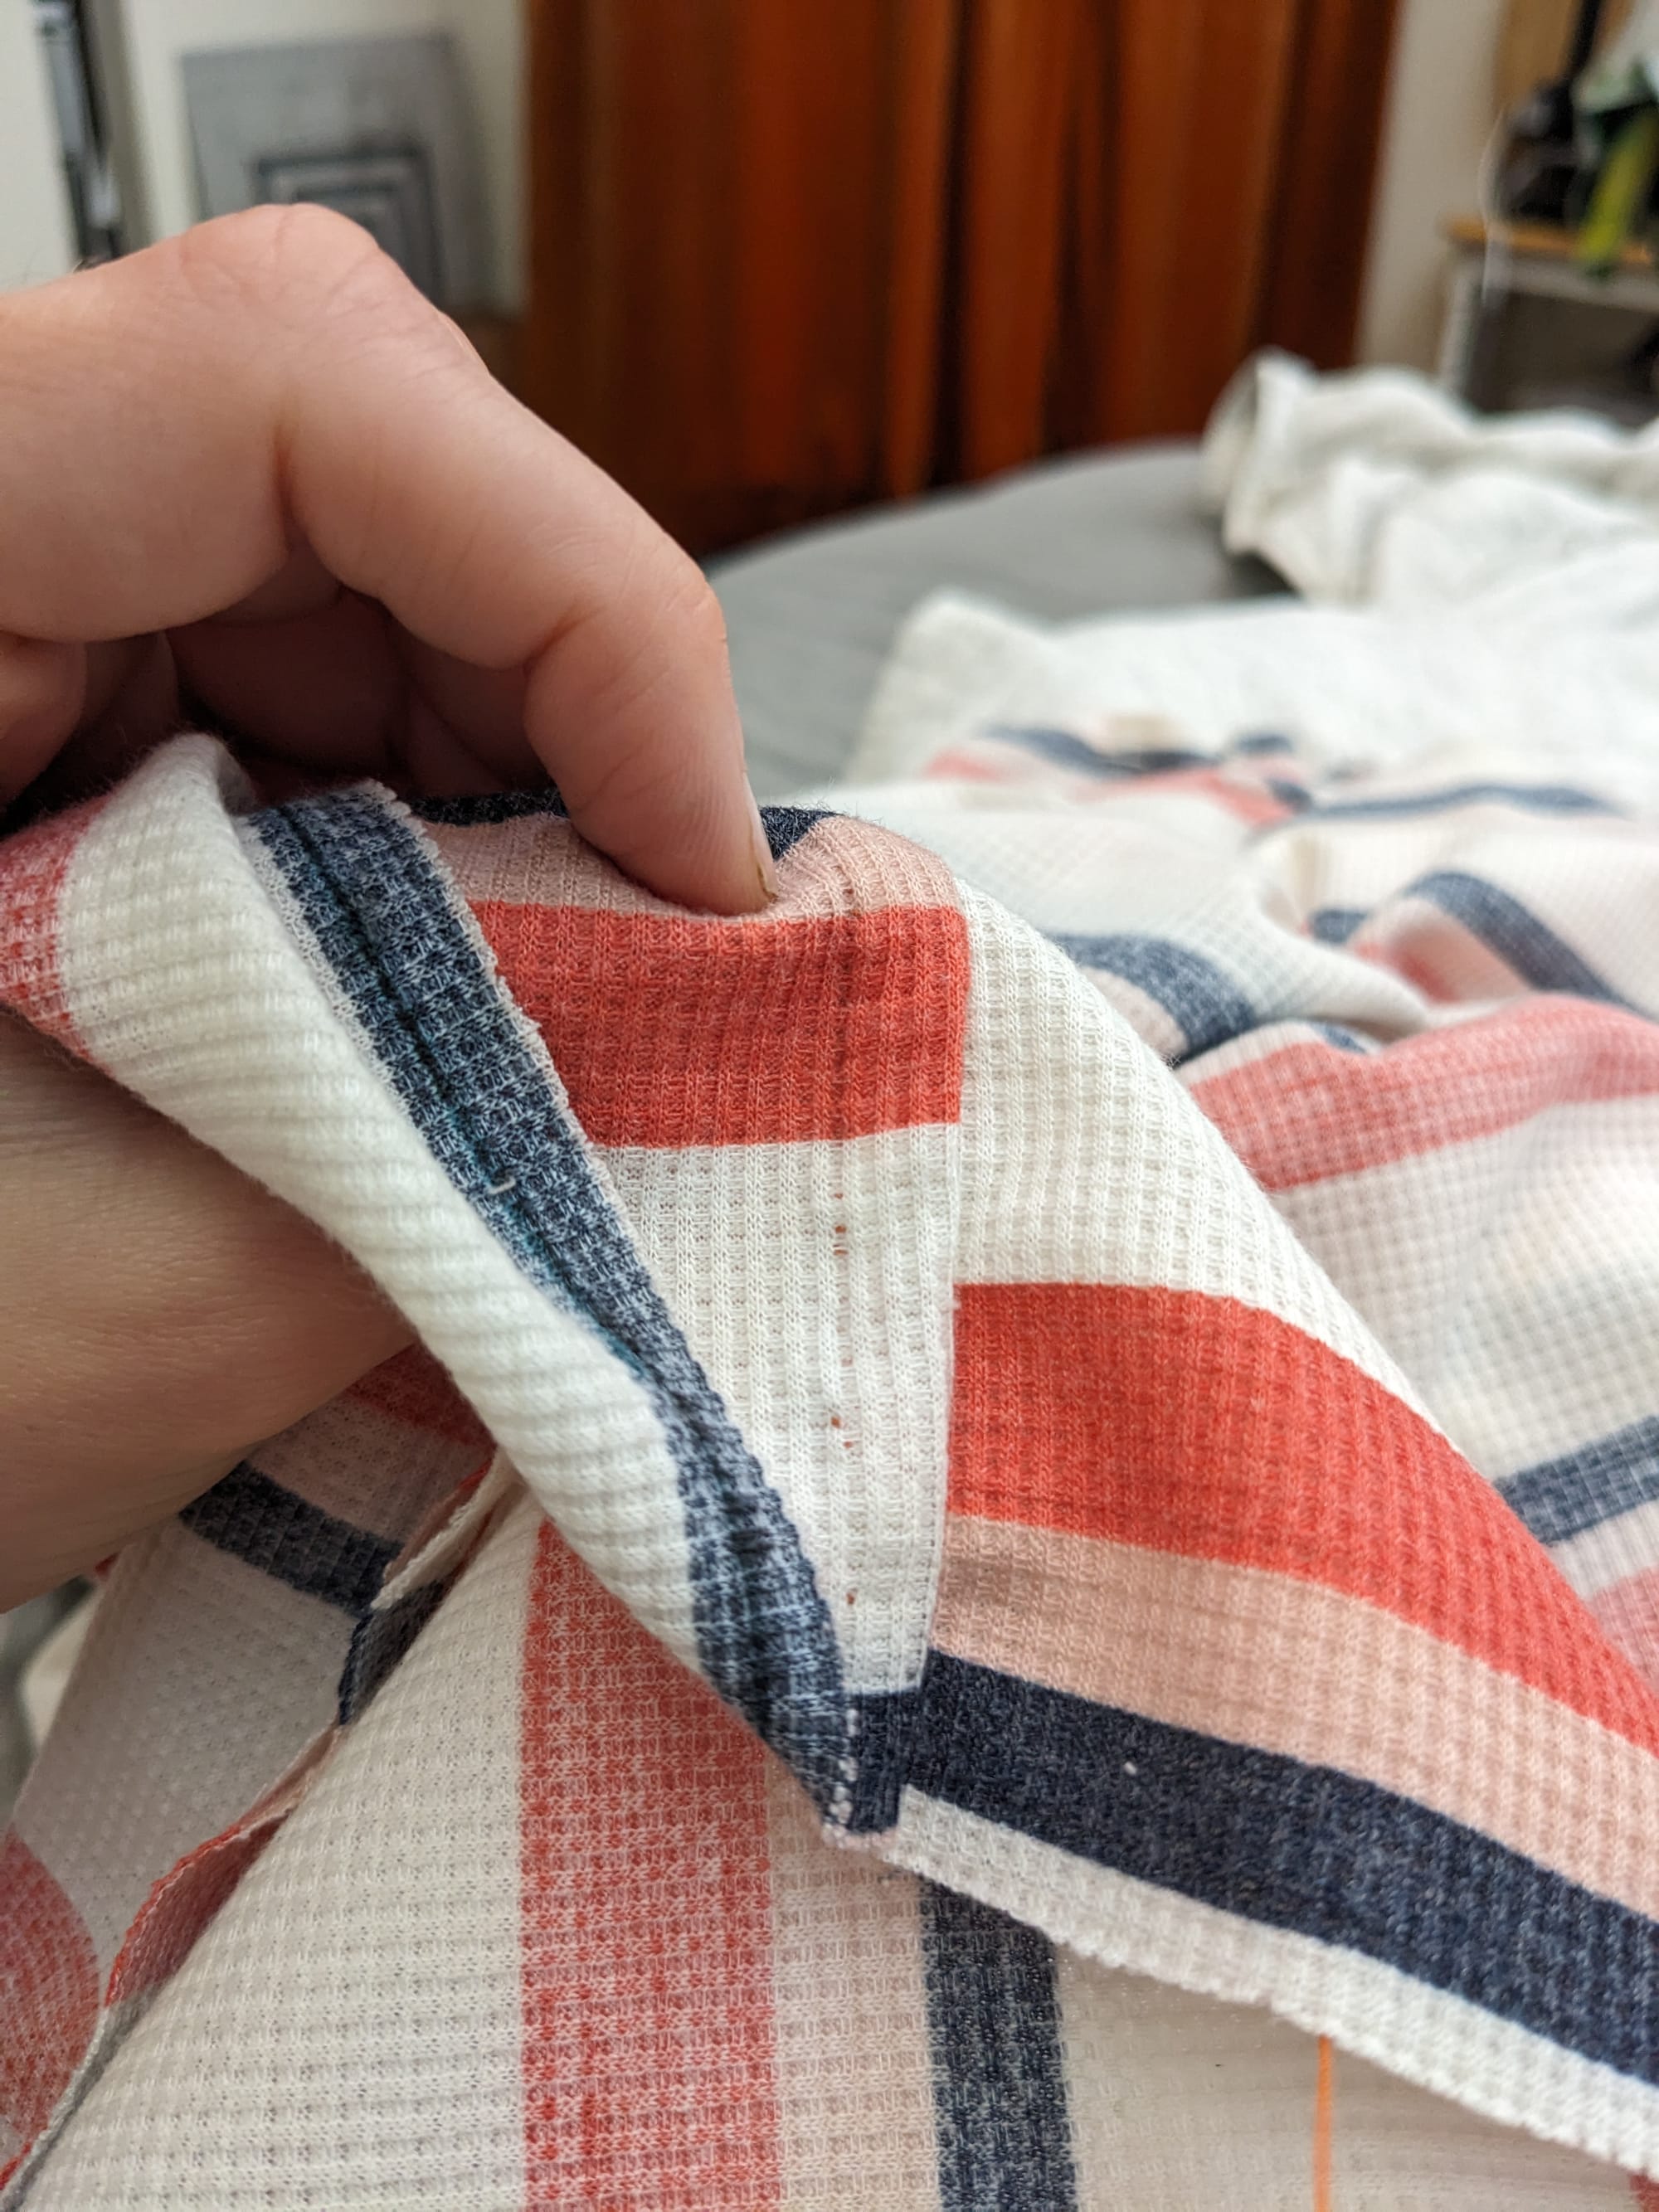
I sewed the main structural seams with a backstitch for strength, and then hand felled them to prevent fraying and keep the seam allowance from getting caught on things. (I don't know why I used orange thread for this. My brain was like "this is an orange project, a project that contains orange" and didn't give it a second thought.) The cool thing about hand-felling seams is that you pick up only a couple of threads on the right side of the fabric for each stitch, making it almost invisible from the outside.
This took forever.
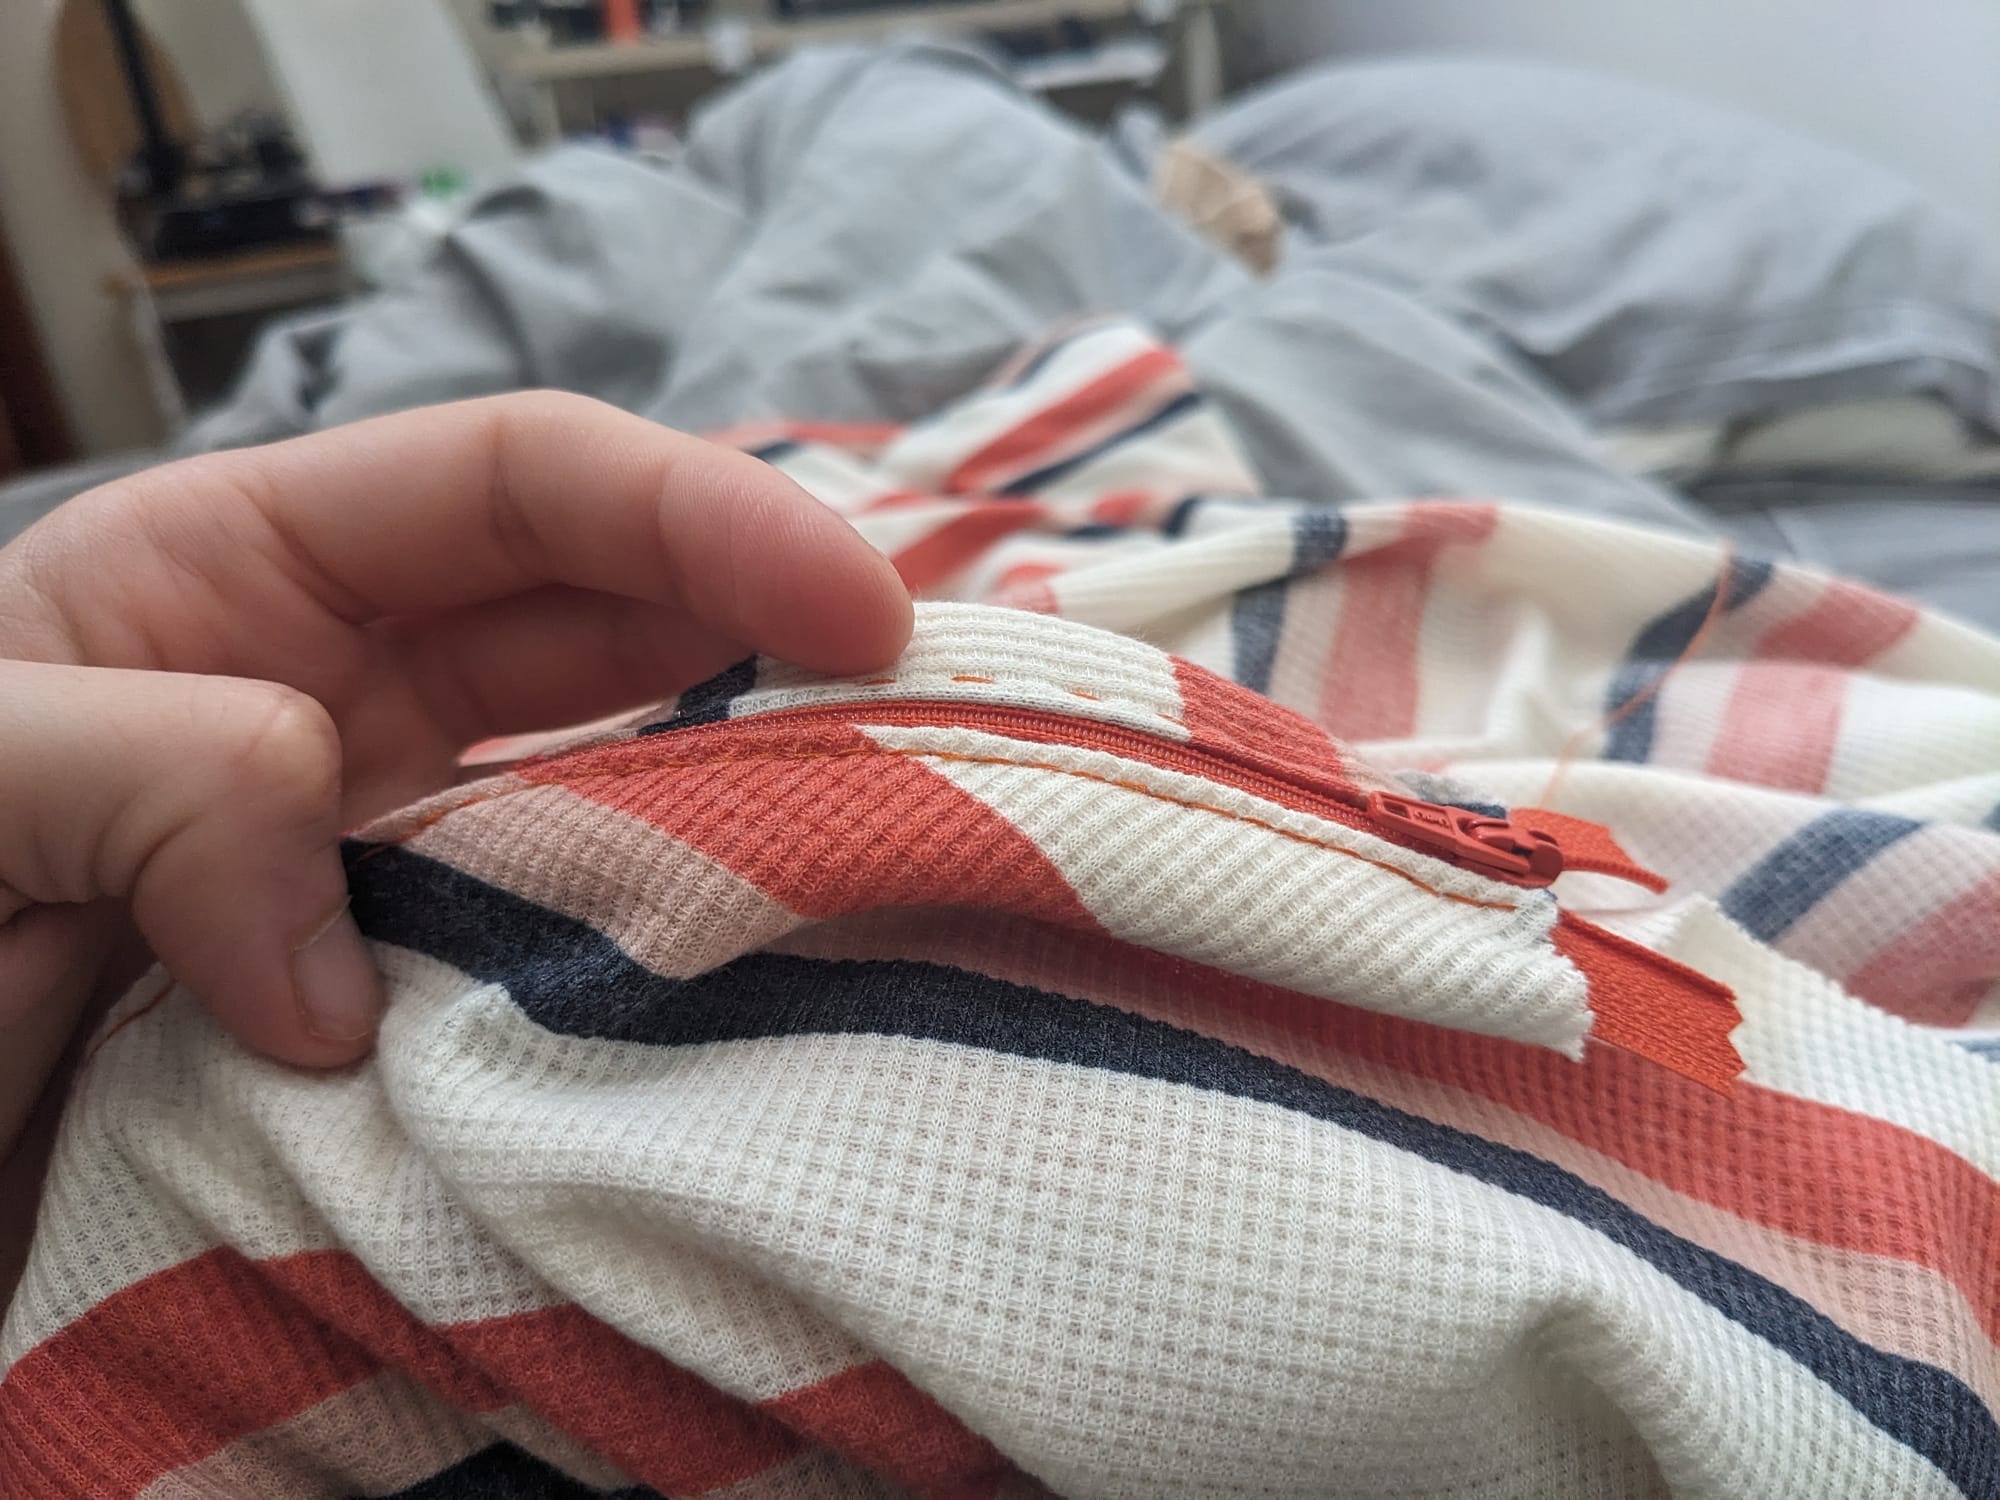
For the zippers, I ended up doing 2 passes with a regular running stitch, filling in the gaps from the first pass on the second. It came out looking great. I never find zippers to be that much of a pain in the ass even though people always make them out to be this super intimidating thing. (Built different ?)
For the drawstring, I formed the bias tape into a sort of tab to hold on the cable locks, and hemmed the ends of the drawstring channel so they wouldn't fray. I threaded the length of shoelace using a safety pin, and tied it off at the ends.
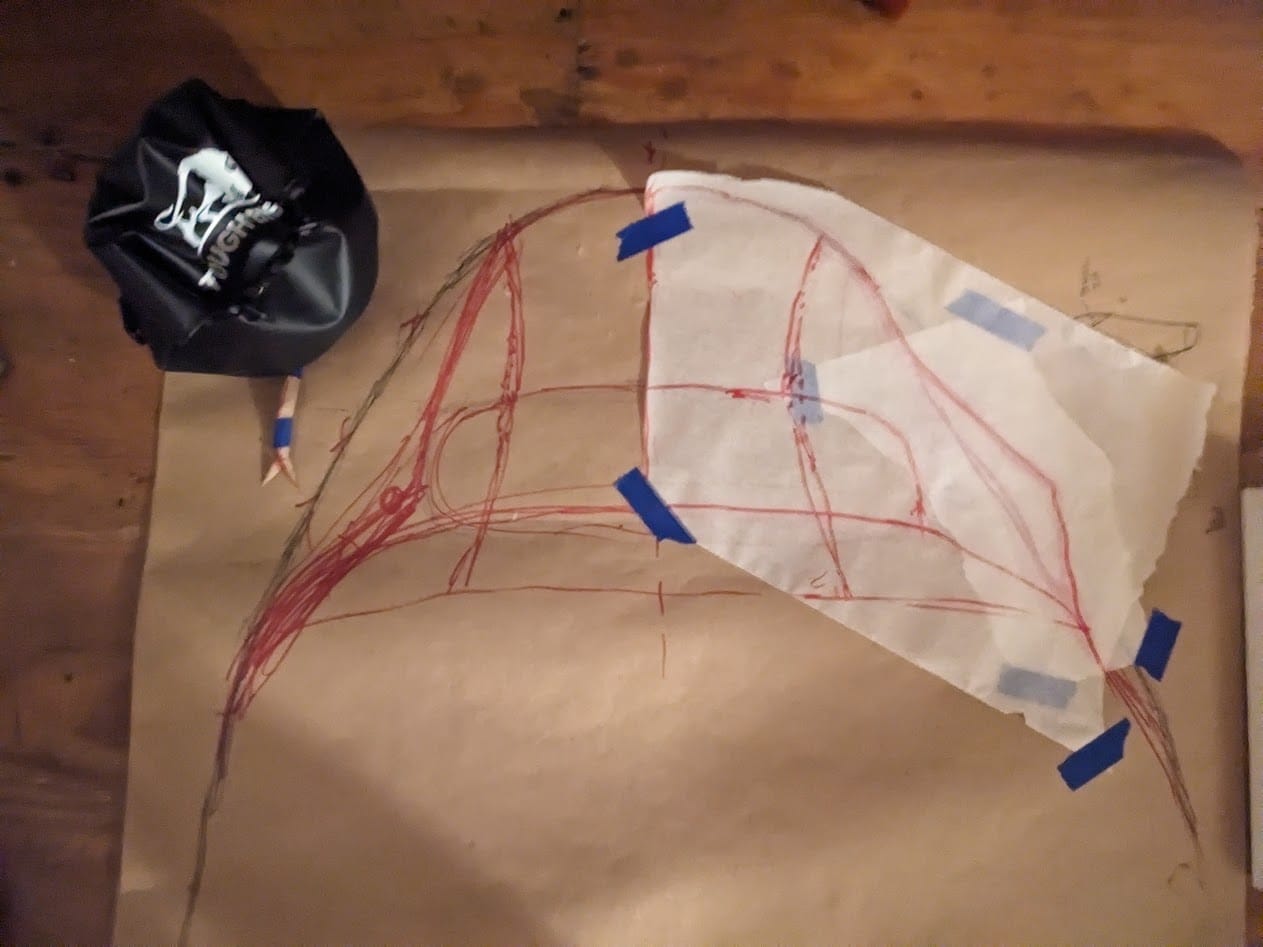
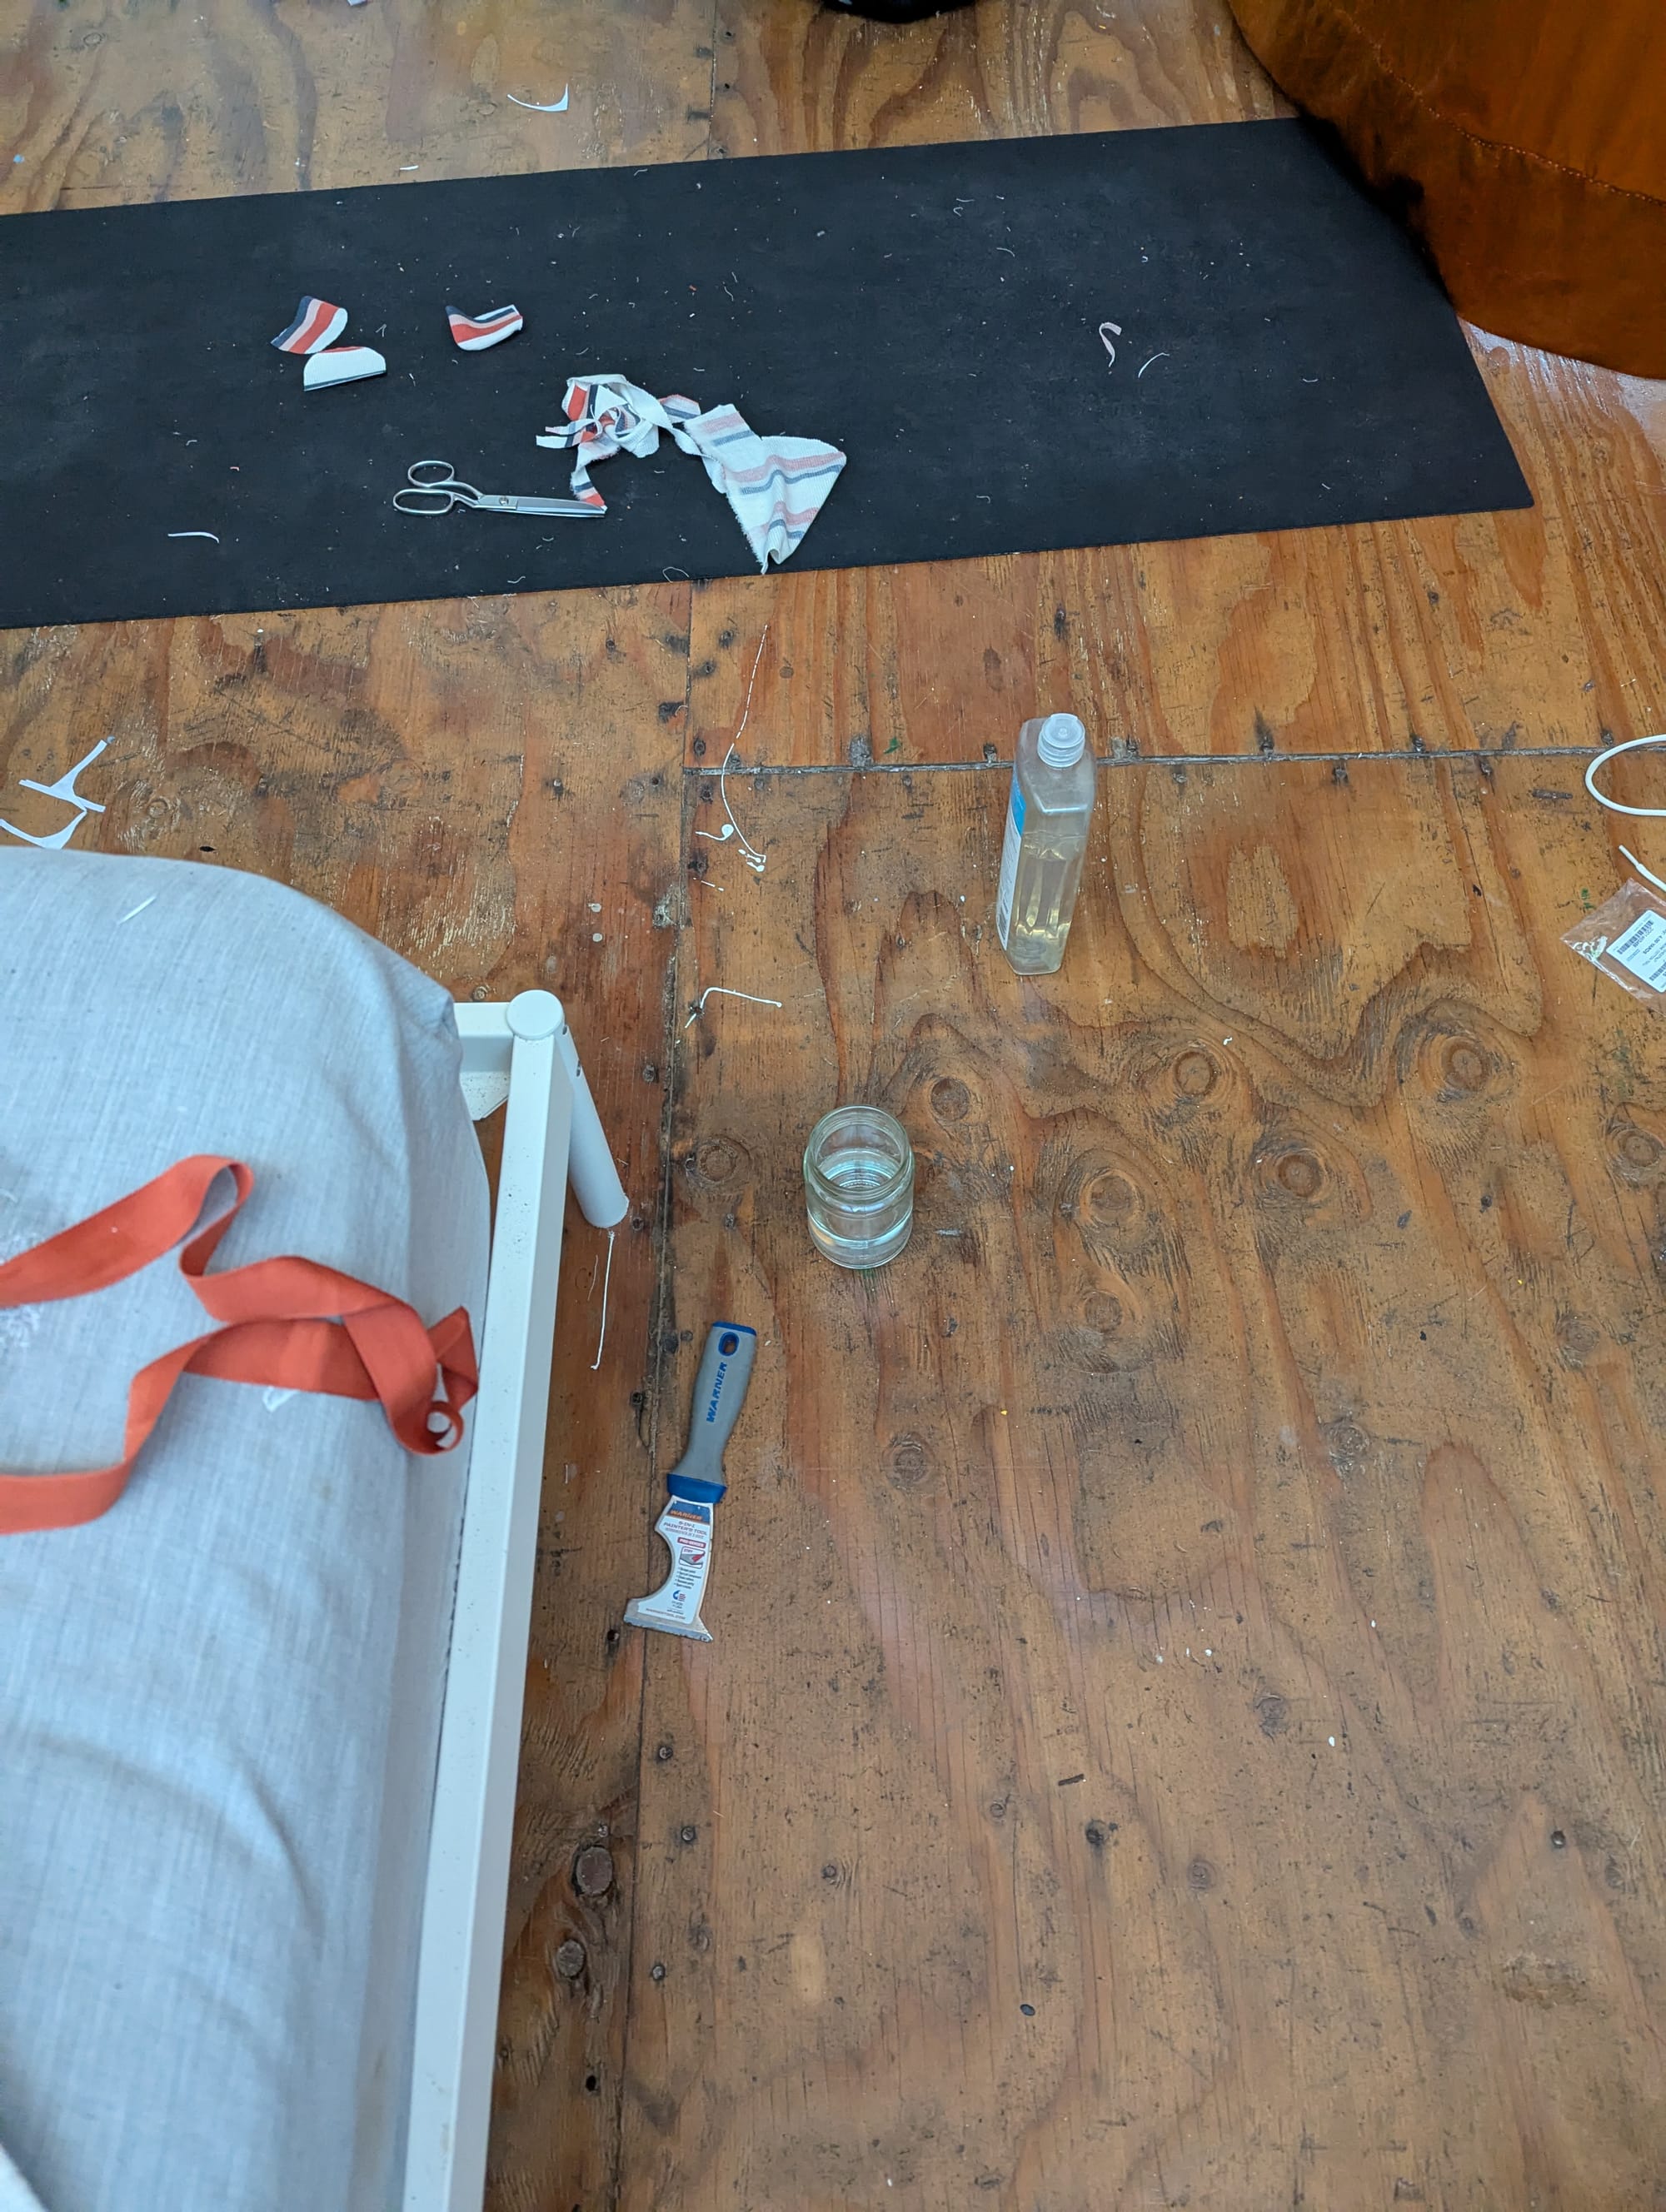
Somehow I have no photos of one of the most interesting parts of this whole construction, the snaps and snap covers that allow the side zippers to be turned into armholes.
By the time I got to this part, I was fully in backpacking prep tornado mode. The only photo I got that shows them somewhat is this one, which I must've taken to document how chaotic my floor situation was. (Love too leave metal tools and jars of water in the path of travel.)
I made these by ironing fusible interlining onto the backside of 2 D-shaped pieces of fabric, and sewing them together inside out. I flipped them right side out, then attached the snaps. The snaps I bought require a special tool, which smashes a metal post inside the snap to secure it to the fabric. I did not have one of these and they are like $25, so I kind of brute forced them using an eyelet tool and needle nose pliers. It worked so-s0.
I sewed the second of these on on the 2-hour drive to Coe, literally tying off the last thread as we pulled up the driveway to the visitor center.

Conclusion
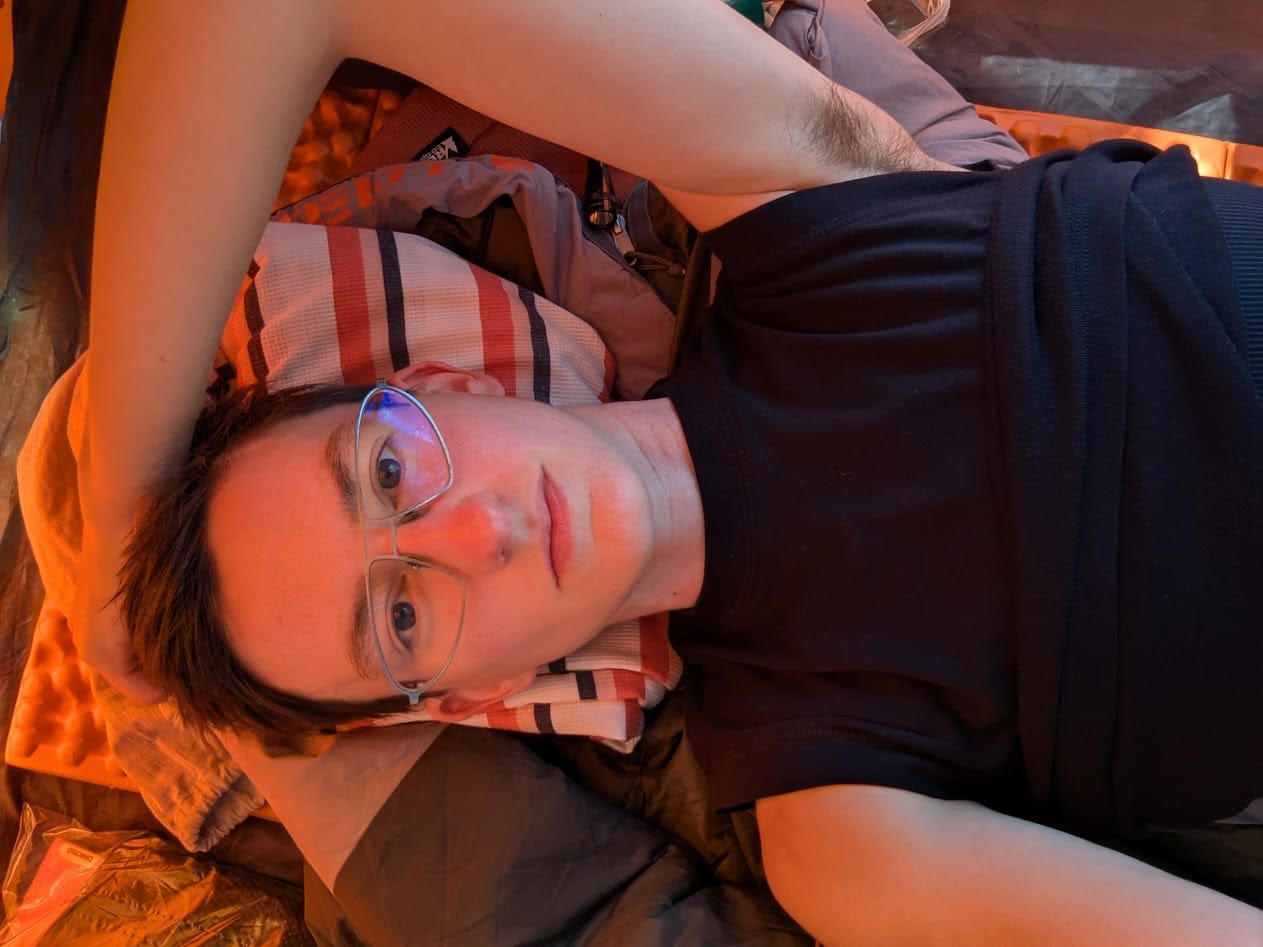
This thing was legitimately life-changing. Holy shit. I slept so much better on this trip. I didn't rapidly fluctuate between cold and hot. And getting out of my tent on cold and windy mornings was so much less painful. When I took a midday nap on my second day after a hike in the heat, it was perfect as a light blanket.
It was rewarding to make something so useful, that made a legitimate impact on my overall experience. I'm excited to hopefully bring this thing along on lots of trips in the future.